IOS本地,APNS遠程推送(具體過程)
添加本地推送
///本地添加
-(void)addLocalPushNotification:(UIButton*)sender;
{


NSLog(@"%s",__FUNCTION__);
UILocalNotification*localNotification=[[UILocalNotificationalloc]init];

if(localNotification){
//設置時間當前加20秒
NSDate*pushDate=[NSDatedateWithTimeIntervalSinceNow:20];
/*推送時區設置:從網上搜到
timeZone是UILocalNotification激發時間是否根據時區改變而改變,如果設置為nil的話,那麼UILocalNotification將在一段時候後被激發,而不是某一個確切時間被激發。*/
localNotification.timeZone=[NSTimeZonedefaultTimeZone];
///推送時間設置
localNotification.fireDate=pushDate;
//時間間隔,若不設置將只會推送1次
localNotification.repeatInterval=kCFCalendarUnitDay;
//推送時的聲音,(若不設置的話系統推送時會無聲音)
localNotification.soundName=UILocalNotificationDefaultSoundName;
//推送的文字信息(若不設置,推送中心中不顯示文字,有聲音提示前提是設置有聲音)
localNotification.alertBody=@"Helloworld";
//推送時小圖標的設置,PS:這個東西不知道還有啥用
localNotification.alertLaunchImage=[[NSBundlemainBundle]pathForResource:@"3"ofType:@"jpg"];

///這個東西,到時用於定位是哪個notification,以便取消用
NSDictionary*infoDic=[NSDictionarydictionaryWithObject:@"name"forKey:@"key"];
localNotification.userInfo=infoDic;

//講推送設置以及信息加入
UIApplication*app=[UIApplicationsharedApplication];
BOOLstatus=YES;
for(UILocalNotification*notificationinapp.scheduledLocalNotifications){
if([notification.userInfoobjectForKey:@"key"]){
status=NO;
}
}

if(status){
//加入推送(只能加入一次)
[appscheduleLocalNotification:localNotification];
}


NSLog(@"%@",app.scheduledLocalNotifications);
}
}
取消本地推送
///本地移除
-(void)removeLocalPushNotification:(UIButton*)sender
{
NSLog(@"%s",__FUNCTION__);
UIApplication*app=[UIApplicationsharedApplication];
//獲取當前應用所有的通知
NSArray*localNotifications=[appscheduledLocalNotifications];

if(localNotifications){

for(UILocalNotification*notificationinlocalNotifications){

NSDictionary*dic=notification.userInfo;

if(dic){
NSString*key=[dicobjectForKey:@"key"];
if([keyisEqualToString:@"name"]){
//取消推送(指定一個取消)
[appcancelLocalNotification:notification];

break;
}
}

}
}
//取消當前應用所有的推送
//[appcancelAllLocalNotifications];


}
遠程推送
當服務端遠程向APNS推送至一台離線的設備時,蘋果服務器Qos組件會自動保留一份最新的通知,等設備上線後,Qos將把推送發送到目標設備上
客戶端需要注意的
bundle ID與App Id一致
設備Token能正常獲取
若為沙盒測試,證書得使用developer的
單設備

如上圖所示:我們的服務端將需要推送的相關信息提交到APNS(Apple Push Notification Service),由APNS在Push服務IOS設備列表中找到對應的設備,並將信息推到終端上,終端上再推到客戶端APP上
多設備

流程大概是這樣的
1.生成CertificateSigningRequest.certSigningRequest文件
2.將CertificateSigningRequest.certSigningRequest上傳進developer,導出.cer文件
3.利用CSR導出P12文件
4.需要准備下設備token值(無空格)
5.使用OpenSSL合成服務器所使用的推送證書
1.打開鑰匙串,在右上角選擇(鑰匙串訪問->證書助理->從證書頒發機構請求證書)
生成CertificateSigningRequest.certSigningRequest

以下信息填寫號後,保存到對應位置

2.進入developer.apple.com中 上傳CertificateSigningRequest.certSigningRequest並保存cer文件
(1)

(2)選擇類型為 推送服務--沙盒測試用

(3)選中對應的APP ID,別忘了,項目配置文件中的Bundle ID與其一致

(4)選擇保存路徑
(5)選擇上傳文件CertificateSigningRequest.certSigningRequest

(6)保存cer文件,並雙擊添加進鑰匙串

(7)新建一個Provisioning Profiles


選中與前面一致的 App Id

選中剛才新建的certificates

選擇可調試設備

保存provisioning文件,並將其加入設備中

通過OPENSSL文件合並
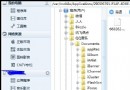
1.在鑰匙串->證書 找到剛才所添加進去的證書 右鍵導出p12
2.進入終端 ,將aps_development.cer轉成PushChatCert.pem(openssl x509 -inaps_development.cer-inform der-out PushChatCert.pem)
3.openssl pkcs12 -nocerts -out PushChatKey.pem -in Push.p12 生成p12私鑰 .pem文件(需設置密碼,服務端推送時要用)
4.利用PushChatCert.pem和新生成的PushChatKey.pem合成一個新的p12文件(這個p12是提供給服務器推送用的)(
opensslpkcs12-export-inPushChatCert.pem-inkeyPushChatKey.pem-certfileCertificateSigningRequest.certSigningRequest-name"aps_developer_identity"-outaps_developer_identity.p12
)
合成PHP所用的PEM文件
 openssl x509 -inaps_development.cer-inform der-out PushChatCert.pem
openssl pkcs12 -nocerts -out PushChatKey.pem -in Push.p12
cat PushChatCert.pem PushChatKey.pem > newck.pem
代碼實現如下
注冊推送通知
[cpp]view plaincopy[[UIApplicationsharedApplication]registerForRemoteNotificationTypes: (UIRemoteNotificationTypeAlert| UIRemoteNotificationTypeBadge| UIRemoteNotificationTypeSound)];
在AppDelegate中加入以下幾個代理方法
[cpp]view plaincopy///Token值成功獲取的時候走的是這個方法(Token值不能帶空格)
-(void)application:(UIApplication*)applicationdidRegisterForRemoteNotificationsWithDeviceToken:(NSData*)deviceToken
{
NSLog(@"%@",deviceToken);
}
///Token值獲取失敗的時候走的是這個方法
-(void)application:(UIApplication*)applicationdidFailToRegisterForRemoteNotificationsWithError:(NSError*)error
{
NSLog(@"%@",error);
}
///應用程序處在打開狀態,且服務器有推送消息過來時,以及通過推送打開應用程序,走的是這個方法
-(void)application:(UIApplication*)applicationdidReceiveRemoteNotification:(NSDictionary*)userInfo
{
for(idkeyinuserInfo){
NSLog(@"%@:%@",key,[userInfoobjectForKey:key]);
}
///Icon推送數量設為0
//application.applicationIconBadgeNumber=0;
}
應用程序不處在後台,且通過推送通知打開的時候,如果需要推送下來相關的信息可以在
[cpp]view plaincopy-(BOOL)application:(UIApplication*)applicationdidFinishLaunchingWithOptions:(NSDictionary*)launchOptions
方法中加入 [cpp]view plaincopy
///應用程序不處在後台,並且是通過推送打開應用的時候
if(launchOptions){
///獲取到推送相關的信息
NSDictionary*userInfo=[launchOptionsobjectForKey:UIApplicationLaunchOptionsRemoteNotificationKey];
}
服務端PHP推送代碼
[cpp]view plaincopy<?php
$deviceToken='ba6d5106503c8e62e68b5df1b36c3b58ced1588c6dabe0fc9e6828961aeb12d6';//沒有空格
$body=array("aps"=>array("alert"=>'helloHui',"badge"=>2,"sound"=>'default'));//推送方式,包含內容和聲音
$ctx=stream_context_create();
//如果在Windows的服務器上,尋找pem路徑會有問題,路徑修改成這樣的方法:
//$pem=dirname(__FILE__).'/'.'apns-dev.pem';
//linux的服務器直接寫pem的路徑即可
stream_context_set_option($ctx,"ssl","local_cert","26ck.pem");
$pass="123123";
stream_context_set_option($ctx,'ssl','passphrase',$pass);
//此處有兩個服務器需要選擇,如果是開發測試用,選擇第二名sandbox的服務器並使用Dev的pem證書,如果是正是發布,使用Product的pem並選用正式的服務器
//$fp=stream_socket_client("ssl://gateway.push.apple.com:2195",$err,$errstr,60,STREAM_CLIENT_CONNECT,$ctx);
$fp=stream_socket_client("ssl://gateway.sandbox.push.apple.com:2195",$err,$errstr,60,STREAM_CLIENT_CONNECT,$ctx);
if(!$fp){
echo"Failedtoconnect$err$errstrn";
return;
}
print"ConnectionOK\n";
$payload=json_encode($body);
$msg=chr(0).pack("n",32).pack("H*",str_replace('','',$deviceToken)).pack("n",strlen($payload)).$payload;
echo"sendingmessage:".$payload."\n";
fwrite($fp,$msg);
fclose($fp);?>