iOS-HQSliderView點擊不同Button切換tableViewCell
編輯:IOS7技巧
效果:
代碼如下
復制代碼
1.自定義的點擊Button切換不同TableViewCell,效果如圖所示

HQSliderView.gif
使用教程:
代碼如下
復制代碼
2.1 導入HQSliderView
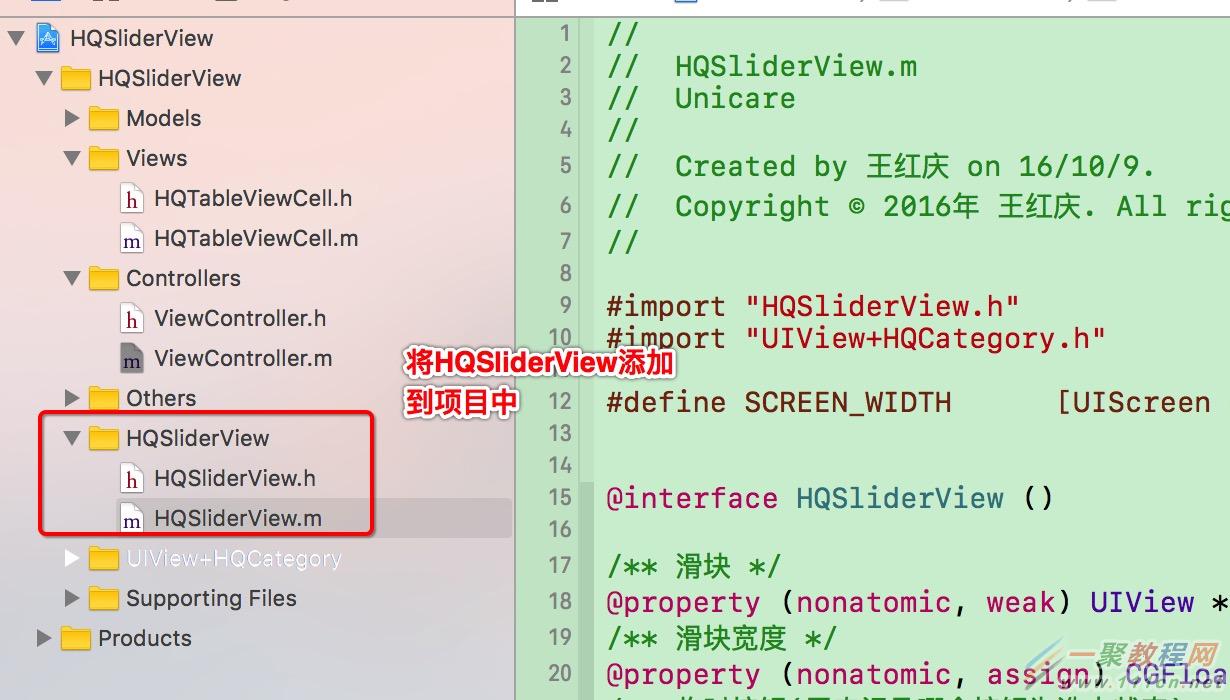
拷貝HQSliderView到項目中.png
代碼如下
復制代碼
2.2 viewDidLoad方法裡面
- (void)viewDidLoad {
    [super viewDidLoad];

    self.view.backgroundColor = [UIColor whiteColor];

    [self setupTopSliderView];
    [self setupTableView];
}#pragma mark - 創建上部SliderView
- (void)setupTopSliderView
{
HQSliderView *sliderView = [[HQSliderView alloc] initWithFrame:CGRectMake(0, NAV_HEIGHT, SCREEN_WIDTH, SLIDER_HEIGHT)];
sliderView.titleArr = @[@"全部", @"待付款", @"已付款", @"退款"];
sliderView.delegate = self;
[self.view addSubview:sliderView];
}#pragma mark - 創建TableView
- (void)setupTableView
{
UITableView *tableView = [[UITableView alloc] initWithFrame:CGRectMake(0, NAV_HEIGHT + SLIDER_HEIGHT, SCREEN_WIDTH, SCREEN_HEIGHT - NAV_HEIGHT)];
tableView.dataSource = self;
[self.view addSubview:tableView];
self.tableView = tableView;
}#pragma mark - UITableViewDataSource
- (NSInteger)tableView:(UITableView *)tableView numberOfRowsInSection:(NSInteger)section
{
if (self.menuTag == 0) {
return 3;
} else if (self.menuTag == 1) {
return 6;
} else if (self.menuTag == 2) {
return 9;
} else {
return 12;
}
}
- (UITableViewCell *)tableView:(UITableView *)tableView cellForRowAtIndexPath:(NSIndexPath *)indexPath
{
HQTableViewCell *cell = [HQTableViewCell tableViewCellWithTableView:tableView];
if (self.menuTag == 0) {
cell.textLabel.text = [NSString stringWithFormat:@"全部 --- 第%ld行", indexPath.row];
} else if (self.menuTag == 1) {
cell.textLabel.text = [NSString stringWithFormat:@"待付款 --- 第%ld行", indexPath.row];
} else if (self.menuTag == 2) {
cell.textLabel.text = [NSString stringWithFormat:@"已付款 --- 第%ld行", indexPath.row];
} else {
cell.textLabel.text = [NSString stringWithFormat:@"退款 --- 第%ld行", indexPath.row];
}
return cell;
}#pragma mark - HQSliderViewDelegate
- (void)sliderView:(HQSliderView *)sliderView didClickMenuButton:(UIButton *)button
{
self.menuTag = button.tag;
[self.tableView reloadData];
}

相關文章
+