Swift - 集成百度地圖的周邊雷達功能
一、周邊雷達功能介紹
1,什麼是周邊雷達
(1)周邊雷達功能,是面向移動端開發者的一套 SDK 功能接口(同步支持 Android 和 iOS 端)。
(2)周邊雷達本質是一個連接百度 LBS 開放平台前端 SDK 產品和後端 LBS 雲的中間服務。
2,使用場景
利用周邊雷達功能,我們可以便捷的在自己的應用內,幫助用戶實現查找周邊跟“我”使用同一款 App 的人。比如:
(1)查看周邊都有誰跟“我”使用同一個 App,分布在哪裡?
(2)查看周邊用戶在聽什麼歌、看什麼文章、有什麼新動態?
(3)查看周邊有什麼最新發生的新聞、資訊?
二、准備工作
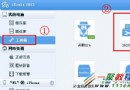
1,申請API Key
首先我們要到百度地圖開放平台上申請個 API Key,供我們程序使用。具體參考我前面一篇文章:Swift - 百度地圖SDK的配置和使用(附樣例)
2,注冊周邊雷達
要使用周邊雷達功能,我們光申請個 API Key 還不夠。還需要對這個Key做相應的注冊操作。
注冊周邊雷達是使用其相應功能的基礎前提。通過注冊可實現一個或多個應用之間的關系綁定,實現相互之間的位置信息查看。
3,集成SDK
周邊雷達是百度地圖SDK產品的一個功能模塊。我們除了要將百度地圖SDK的基礎包集成進來外,還要集成周邊雷達相關庫(BaiduMapAPI_Radar.framework)。具體集成方式同樣參考前文。
同時橋接頭文件中也要將雷達庫文件 import 進來。
#import <BaiduMapAPI_Base/BMKBaseComponent.h> //引入base相關所有的頭文件
#import <BaiduMapAPI_Map/BMKMapComponent.h> //引入地圖功能所有的頭文件
#import <BaiduMapAPI_Map/BMKMapView.h> //只引入所需的單個頭文件X
#import <BaiduMapAPI_Radar/BMKRadarComponent.h> //引入周邊雷達功能所有的頭文件
/****** 下面的幾個暫時不需要 ******/
//#import <BaiduMapAPI_Search/BMKSearchComponent.h> //引入檢索功能所有的頭文件
//#import <BaiduMapAPI_Cloud/BMKCloudSearchComponent.h> //引入雲檢索功能所有的頭文件
//#import <BaiduMapAPI_Location/BMKLocationComponent.h> //引入定位功能所有的頭文件
//#import <BaiduMapAPI_Utils/BMKUtilsComponent.h> //引入計算工具所有的頭文件
三、樣例介紹
下面通過“附近的人”這個小樣例演示周邊雷達的使用。
(1)程序啟動後,應用會自動定時上傳用戶位置信息(每隔5秒)
(2)上傳位置的時候我們同時還附帶上傳用戶名(隨機生成的)
(3)主界面有個“附近的人”列表,顯示500米范圍內其他的用戶,以及離你的距離(列表也是5秒鐘刷新一次)。
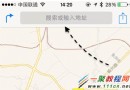
(4)只用一台手機不太好看出效果。拿兩台或以上數量的手機測試的話,就可以看到其他人信息,以及他們離你的距離。比如我這裡用3部手機測試,其中1部手機的運行效果如下:
四、樣例代碼
1,info.plist
由於我們要使用 CoreLocation 獲取實時位置數據,所以在 info.plist 裡加入定位描述(Value 值為空也可以):
NSLocationWhenInUseDescription :允許在前台獲取GPS的描述
NSLocationAlwaysUsageDescription :允許在後台獲取GPS的描述
2,AppDelegate.swift
在這裡使用我們之前申請的授權 Key,來對 BMKMapManager 進行聲明和初始化。
import UIKit
@UIApplicationMain
class AppDelegate: UIResponder, UIApplicationDelegate, BMKGeneralDelegate {
var window: UIWindow?
var _mapManager: BMKMapManager?
func application(application: UIApplication,
didFinishLaunchingWithOptions launchOptions: [NSObject: AnyObject]?) -> Bool {
_mapManager = BMKMapManager()
// 如果要關注網絡及授權驗證事件,請設定generalDelegate參數
let ret = _mapManager?.start("mRYTrHzAZUlT5Aojf5tMSxxxxxxxxxxx",
generalDelegate: self)
if ret == false {
NSLog("manager start failed!")
}
return true
}
//...............
3,ViewController.swift
位置信息上傳、周邊位置檢索並顯示等功能都在這裡實現。這裡要注意的是在上傳和獲取位置信息前,我們需要設置 userid。
如果我們不設置的話,這個也會自動生成的。自動生成的userid 是唯一的,且與當前設備有關。也就是說對於同一個設備每次啟動程序後,生成的 userid 都是一樣的。(所以多次關閉啟動程序不會造成不斷新增新用戶的問題)
import UIKit
import CoreLocation
class ViewController: UIViewController, CLLocationManagerDelegate, BMKRadarManagerDelegate,
UITableViewDelegate, UITableViewDataSource {
//定位管理器
let locationManager:CLLocationManager = CLLocationManager()
//當前位置坐標
var currCoordinate:CLLocationCoordinate2D?
//周邊雷達管理類
var _radarManager:BMKRadarManager?
//定時器,用於定時請求周邊信息數據
var timer:NSTimer!
//周邊用戶集合
var infoList:[BMKRadarNearbyInfo] = [BMKRadarNearbyInfo]()
//顯示周邊用戶的表格
var tableView:UITableView?
//當前用戶名稱
var userName:String!
override func viewDidLoad() {
super.viewDidLoad()
//隨機生成一個用戶名
userName = "陌生人\(String(format: "%03i", Int(arc4random()%1000)))"
self.title = "\(userName),你好!下面是你周圍的人。"
//設置定位服務管理器代理
locationManager.delegate = self
//設置定位進度
locationManager.desiredAccuracy = kCLLocationAccuracyBest
//更新距離
locationManager.distanceFilter = 100
////發送授權申請
locationManager.requestAlwaysAuthorization()
if (CLLocationManager.locationServicesEnabled()){
//允許使用定位服務的話,開啟定位服務更新
locationManager.startUpdatingLocation()
print("定位開始")
}
//獲取周邊雷達管理類實例
_radarManager = BMKRadarManager.getRadarManagerInstance()
//在上傳和拉取位置信息前,需要設置userid,否則會自動生成
//_radarManager?.userId = "u007"
//通過添加radar delegate獲取自動上傳時的位置信息,以及獲得雷達操作結果
_radarManager?.addRadarManagerDelegate(self)
//位置信息連續自動上傳(每隔5秒上傳一次)
_radarManager?.startAutoUpload(5)
//啟用計時器,控制每5秒執行一次requestNearbyData方法,請求周邊信息
timer = NSTimer.scheduledTimerWithTimeInterval(5,
target:self,selector:#selector(ViewController.requestNearbyData),
userInfo:nil,repeats:true)
//創建表視圖
self.tableView = UITableView(frame: self.view.frame, style:UITableViewStyle.Plain)
self.tableView!.delegate = self
self.tableView!.dataSource = self
//創建一個重用的單元格
self.tableView!.registerClass(UITableViewCell.self,
forCellReuseIdentifier: "SwiftCell")
self.view.addSubview(self.tableView!)
}
//定位改變執行,可以得到新位置、舊位置
func locationManager(manager: CLLocationManager,
didUpdateLocations locations: [CLLocation]) {
//獲取最新的坐標
currCoordinate = locations.last!.coordinate
}
//獲取我的位置信息(自動上傳調用)
func getRadarAutoUploadInfo() -> BMKRadarUploadInfo! {
if let pt = currCoordinate{
let myinfo = BMKRadarUploadInfo()
myinfo.extInfo = userName
//myinfo.pt = CLLocationCoordinate2DMake(39.916, 116.404)
myinfo.pt = pt
return myinfo
}else{
return nil
}
}
//返回雷達 上傳結果
func onGetRadarUploadResult(error: BMKRadarErrorCode) {
if error == BMK_RADAR_NO_ERROR {
print("位置上傳成功")
}else{
print("位置上傳失敗")
}
}
//發起檢索請求,獲取周邊信息
func requestNearbyData() {
if let centerPt = currCoordinate {
let option = BMKRadarNearbySearchOption()
option.radius = 500 //檢索半徑
option.sortType = BMK_RADAR_SORT_TYPE_DISTANCE_FROM_NEAR_TO_FAR //排序方式
option.centerPt = centerPt //檢索中心點
//發起檢索
let res = _radarManager?.getRadarNearbySearchRequest(option)
if res! {
print("周邊信息獲取成功")
} else {
print("周邊信息獲取失敗")
}
}
}
//獲取到周邊位置信息回調
func onGetRadarNearbySearchResult(result: BMKRadarNearbyResult!, error: BMKRadarErrorCode) {
if error == BMK_RADAR_NO_ERROR {
print("周邊用戶數量:",result.totalNum)
self.infoList = result.infoList as! [BMKRadarNearbyInfo]
self.tableView?.reloadData()
}
}
//在本例中,只有一個分區
func numberOfSectionsInTableView(tableView: UITableView) -> Int {
return 1;
}
//返回表格行數(也就是返回控件數)
func tableView(tableView: UITableView, numberOfRowsInSection section: Int) -> Int {
return self.infoList.count
}
//創建各單元顯示內容(創建參數indexPath指定的單元)
func tableView(tableView: UITableView, cellForRowAtIndexPath indexPath: NSIndexPath)
-> UITableViewCell {
let cell = UITableViewCell(style: UITableViewCellStyle.Value1,
reuseIdentifier: "SwiftCell")
cell.textLabel?.text = self.infoList[indexPath.row].extInfo
cell.detailTextLabel?.text = "\(self.infoList[indexPath.row].distance)m"
return cell
}
override func didReceiveMemoryWarning() {
super.didReceiveMemoryWarning()
}
}

- iOS10告訴框架UserNotification懂得與運用
- iOS Webview自順應現實內容高度的4種辦法詳解
- iOS10 App適配權限 Push Notifications 字體Frame 碰到的成績
- iOS獲得以後裝備WiFi信息的辦法
- iPhone/iPad開辟經由過程LocalNotification完成iOS准時當地推送功效
- iOS推送之當地告訴UILocalNotification
- iOS開辟之widget完成詳解
- iOS10添加當地推送(Local Notification)實例
- iOS Remote Notification長途新聞推送處置
- IOS上iframe的轉動條掉效的處理方法
- Swift 同享文件操作小結(iOS 8 +)
- Swift 2.1 為 UIView 添加點擊事宜和點擊後果
- 在Swift中應用JSONModel 實例代碼
- 應用Swift代碼完成iOS手勢解鎖、指紋解鎖實例詳解
- 詳解iOS App中UISwitch開關組件的根本創立及應用辦法