IOS UITableView分組顯示數據列表教程
編輯:IOS7技巧
UITableView有兩種風格:UITableViewStylePlain和UITableViewStyleGrouped。這兩者操作起來其實並沒有本質區別,只是後者按分組樣式顯示前者按照普通樣式顯示而已。今天我們就看看分組的使用:
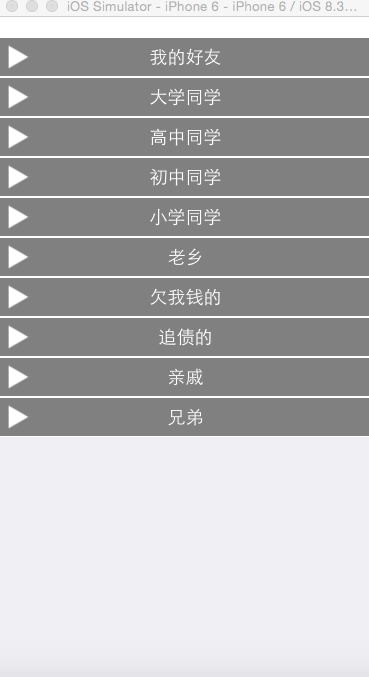
1、首先我們介紹一下分組的tableView,初始化一個tableView如下
#pragma mark - 加載表視圖
- (void) loadTableView{

      _tableView=[[UITableView alloc] initWithFrame:CGRectMake(0,20, kWidth, kHeight) style:UITableViewStyleGrouped];

    //設置代理
    _tableView.delegate=self;
    _tableView.dataSource=self;

    //設置行高
    _tableView.rowHeight=60;
    //隱藏分組腳的高度
    _tableView.sectionFooterHeight=0;
    [self.view addSubview:_tableView];
}
2、加載數據,分組數據我們已經在plist文件中定義,加載代碼如下:
#pragma mark - 加載數據
- (void)loadData{

    NSString * path=[[NSBundle mainBundle] pathForResource:@"friends.plist" ofType:nil];
    _array=[NSArray arrayWithContentsOfFile:path];

}
3、初始化代理方法
#pragma mark - 設置分組的個數
- (NSInteger) numberOfSectionsInTableView:(UITableView *)tableView{
    return _array.count;
}
#pragma mark - 設置分組的高度
- (CGFloat) tableView:(UITableView *)tableView heightForHeaderInSection:(NSInteger)section{
    return 40;
}
#pragma mark - 自定義分組頭
- (UIView *) tableView:(UITableView *)tableView viewForHeaderInSection:(NSInteger)section{


    NSDictionary *dic=_array[section];
    NSString * title=dic[@"group"];
    //1 自定義頭部
    UIView * view=[[UIView alloc] init];
     view.backgroundColor=[UIColor grayColor];
    view.layer.borderWidth=1;
    view.layer.borderColor=[UIColor whiteColor].CGColor;

    // 2 增加按鈕
    UIButton * button=[UIButton buttonWithType:UIButtonTypeCustom];
    [button setTitle:title forState:UIControlStateNormal];
    button.frame=CGRectMake(0, 0, kWidth, 40);
    button.tag=section;
    [button addTarget:self action:@selector(clickTheGroup:) forControlEvents:UIControlEventTouchUpInside];
    [view addSubview:button];

    //3 添加左邊的箭頭
    UIImageView * imageView=[[UIImageView alloc] initWithFrame:CGRectMake(5, 40/2.0-30/2.0, 30, 30)];
    imageView.image=[UIImage imageNamed:@"disclosure.png"];
    imageView.tag=101;
    [button addSubview:imageView];
    [_headImageView setObject:imageView forKey:@(section)];
    return view;
}
#pragma mark - UITableViewDataSource
- (NSInteger) tableView:(UITableView *)tableView numberOfRowsInSection:(NSInteger)section{


        return 0;

}
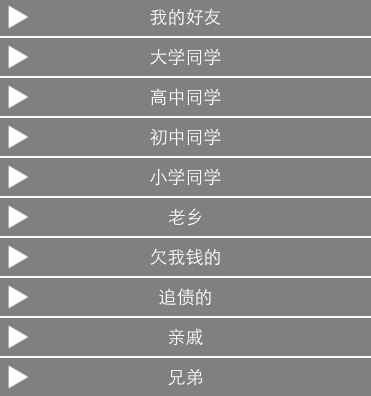
效果圖如下:
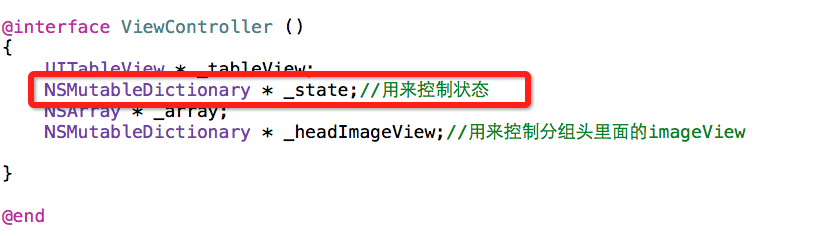
4、我們就可以點擊某個分組進行刷新數據了,通過控制當前分組中數據的個數來達到該效果,由於當前的分組狀態有兩個關閉和打開,因此我們需要定義一個字典來控制狀態,該字典的key為當前分組的索引,值為1 的時候為打開,值為2的時候為關閉。每次點擊的時候我們需要給當前的狀態重新初始化,當前狀態改變的時候對應的分組包含的數據條數置為0
- (NSInteger) tableView:(UITableView *)tableView numberOfRowsInSection:(NSInteger)section{

    int flag=[_state[@(section)] intValue];
    NSDictionary *dic=_array[section];
    NSArray * friends=dic[@"friends"];
    if(flag){
        return friends.count;
    }else{
        return 0;
    }

}
5、刷新需要控制三角號圖標的旋轉,因此我們需要通過動畫,完成當前效果
#pragma mark - 點擊分組信息
- (void) clickTheGroup:(UIButton * ) button{
    int groupIndex=(int)button.tag;
    int flag=0;//用來控制重新實例化按鈕

    if([_state[@(groupIndex)] intValue]==0){
        [_state setObject:@(1) forKey:@(groupIndex)];
        flag=0;
    }else{
        [_state setObject:@(0) forKey:@(groupIndex)];
        flag=1;

    }

    //刷新當前的分組
    NSIndexSet * set=[[NSIndexSet alloc] initWithIndex:groupIndex];

    [_tableView reloadSections:set withRowAnimation:UITableViewRowAnimationNone];

    UIImageView * imageView=_headImageView[@(groupIndex)];

    //模擬動畫,每次都重新刷新了因此仿射變化恢復到原始狀態了
    if(flag){
        imageView.transform=CGAffineTransformRotate(imageView.transform, M_PI_2);
    }

    [UIView animateWithDuration:0.3 animations:^{

        if(flag==0){
            imageView.transform=CGAffineTransformMakeRotation( M_PI_2);
        }else{
            imageView.transform=CGAffineTransformMakeRotation(0);
        }
    }];

}
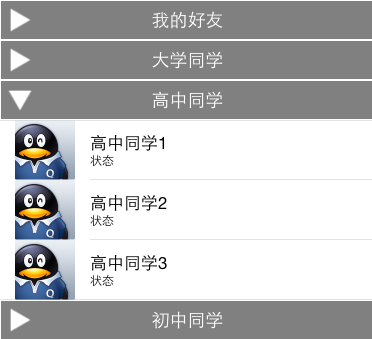
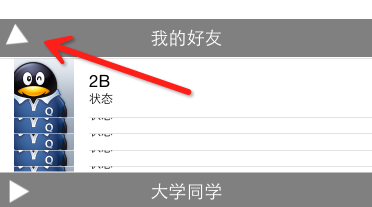
完成後效果如下:
動畫瞬間效果
ios 自定義UITableView中分組的標題sectionview
//section的標題欄高度
-(cgfloat)tableview:(uitableview *)tableview heightforheaderinsection:(nsinteger)section
{
    if (section == 0)
        return 46;
    else
        return 30.0f;
}


-(uiview *)tableview:(uitableview *)tableview viewforheaderinsection:(nsinteger)section
{
    cgrect headerframe = cgrectmake(0, 0, 300, 30);
    cgfloat y = 2;
    if (section == 0) {
        headerframe = cgrectmake(0, 0, 300, 100);
        y = 18;
    }
    uiview *headerview = [[uiview alloc] initwithframe:headerframe];
    uilabel *datelabel=[[uilabel alloc] initwithframe:cgrectmake(20, y, 240, 24)];//日期標簽
    datelabel.font=[uifont boldsystemfontofsize:16.0f];
    datelabel.textcolor = [uicolor darkgraycolor];
    datelabel.backgroundcolor=[uicolor clearcolor];
    uilabel *agelabel=[[uilabel alloc] initwithframe:cgrectmake(216, y, 88, 24)];//年齡標簽
    agelabel.font=[uifont systemfontofsize:14.0];
    agelabel.textalignment=uitextalignmentright;
    agelabel.textcolor = [uicolor darkgraycolor];
    agelabel.backgroundcolor=[uicolor clearcolor];

    nsdateformatter *dateformatter = [[nsdateformatter alloc] init];
    dateformatter.dateformat = @"mm dd,yyyy";
    datelabel.text = [nsstring stringwithformat:@"%@",[dateformatter stringfromdate:[nsdate date]]];
    agelabel.text = @"1歲 2天";

    [headerview addsubview:datelabel];
    [headerview addsubview:agelabel];
    return headerview;
}

相關文章
+