動態計算UITableViewCell高度詳解
不知道大家有沒有發現,在iOS APP開發過程中,UITableView是我們顯示內容常見的控件,本人覺得它是UIKit中最復雜的一個控件。今天要向大家介紹的就是如何動態計算UITableViewCell高度的一經驗與技巧,在此做一些總結方便朋友們查閱。
為了不讓講解空洞抽象,我還是用代碼實例的方式進行講解,這樣更容易接收與學習。
本文將介紹四種情況下UITableViewCell的計算方式,分別是:
- Auto Layout with UILabel in UITableViewCell
- Auto Layout with UITextView in UITableViewCell
- Manual Layout with UILabel in UITableViewCell
- Manual Layout with UITextView in UITableViewCell
- 隨UITextView高度動態改變Cell高度
由於只是一個demo,所以命名這些都是隨意從簡。
首先創建一個Single Page的工程,我命名為CellHeightDemo
1. Auto Layout with UILabel in UITableViewCell
創建一個空的xib,命名為C1.xib, 然後拖入一個UITableViewCell控件。接著創建一個UITableViewCell的子類,命名為C1類。然後在C1.xib中,將與C1類進行關聯。別給我說你不會關聯,如果不會那看下圖你就明白了。V^

只需要在Class那裡寫入關聯的類名C1即可。
還有由於UITableViewCell需要重用功能,所以我們還需要設置一個重用標識

在Identifier那裡寫入重用標識C1,當然你也可以用任意字符。不過後面代碼裡需要這個字符。
接著我們來布局。用到了auto layout, 在此我不想介紹auto layout, 以後有時間再專門介紹,下圖就是我布局

這兒有兩點需要說明:1. UILabel的屬性Lines這兒設為了0表示顯示多行。2. Auto Layout一定要建立完完整。
接著我們在UITableView中來使用我們自定義的UITableViewCell C1.
首先我們創建一個UITableViewController的子類T1ViewController, 接著在Main.storyboard中拖入一個UITableViewController,並關聯T1ViewController.

一切都准備好了,那我們現在來寫點代碼,給UITableView加點料。
我們想要我們的UITableView使用C1.xib中自定義的Cell,那麼我們需要向UITableView進行注冊。
UINib *cellNib = [UINib nibWithNibName:@"C1" bundle:nil];
[self.tableView registerNib:cellNib forCellReuseIdentifier:@"C1"];
這樣就進行注冊了,接著我們還需要每行顯示的數據,為了簡單一點,我就聲明了一個NSArray變量來存放數據。
self.tableData = @[@"1n2n3n4n5n6", @"123456789012345678901234567890", @"1n2", @"1n2n3", @"1"];
現在實現UITableViewDataSource的protocol:
- (NSInteger)tableView:(UITableView *)tableView numberOfRowsInSection:(NSInteger)section
{
    // Return the number of rows in the section.
    return self.tableData.count;
}

- (UITableViewCell *)tableView:(UITableView *)tableView cellForRowAtIndexPath:(NSIndexPath *)indexPath
{
    C1 *cell = [self.tableView dequeueReusableCellWithIdentifier:@"C1"];
    cell.t.text = [self.tableData objectAtIndex:indexPath.row];
    return cell;
}
從self.tableData中的數據我們可以看到,每一個Cell顯示的數據高度是不一樣的,那麼我們需要動態計算Cell的高度。由於是auto layout,所以我們需要用到一個新的API systemLayoutSizeFittingSize:來計算UITableViewCell所占空間高度。Cell的高度是在- (CGFloat)tableView:(UITableView )tableView heightForRowAtIndexPath:(NSIndexPath )indexPath這個UITableViewDelegate的方法裡面傳給UITableView的。
這裡有一個需要特別注意的問題,也是效率問題。UITableView是一次性計算完所有Cell的高度,如果有1W個Cell,那麼- (CGFloat)tableView:(UITableView)tableView heightForRowAtIndexPath:(NSIndexPath )indexPath就會觸發1W次,然後才顯示內容。不過在iOS7以後,提供了一個新方法可以避免這1W次調用,它就是- (CGFloat)tableView:(UITableView )tableView estimatedHeightForRowAtIndexPath:(NSIndexPath )indexPath。要求返回一個Cell的估計值,實現了這個方法,那只有顯示的Cell才會觸發計算高度的protocol. 由於systemLayoutSizeFittingSize需要cell的一個實例才能計算,所以這兒用一個成員變量存一個Cell的實列,這樣就不需要每次計算Cell高度的時候去動態生成一個Cell實例,這樣即方便也高效也少用內存,可謂一舉三得。
我們聲明一個存計算Cell高度的實例變量:
@property (nonatomic, strong) UITableViewCell *prototypeCell;
然後初始化它:
self.prototypeCell = [self.tableView dequeueReusableCellWithIdentifier:@"C1"];
下面是計算Cell高度的實現:
- (CGFloat)tableView:(UITableView *)tableView heightForRowAtIndexPath:(NSIndexPath *)indexPath {
    C1 *cell = (C1 *)self.prototypeCell;
    cell.t.text = [self.tableData objectAtIndex:indexPath.row];
    CGSize size = [cell.contentView systemLayoutSizeFittingSize:UILayoutFittingCompressedSize];
    NSLog(@"h=%f", size.height + 1);
    return 1  + size.height;
}
看了代碼,可能你有點疑問,為何這兒要加1呢?筆者告訴你,如果不加1,結果就是錯誤的,Cell中UILabel將顯示不正確。原因就是因為這行代碼CGSize size = [cell.contentView systemLayoutSizeFittingSize:UILayoutFittingCompressedSize];由於是在cell.contentView上調用這個方法,那麼返回的值將是contentView的高度,UITableViewCell的高度要比它的contentView要高1,也就是它的分隔線的高度。如果你不相信,那請看C1.xib的屬性,比較下面兩張圖。

 發現沒Cell的高度是127, 面contentView的高度是126, 這下明白了吧。
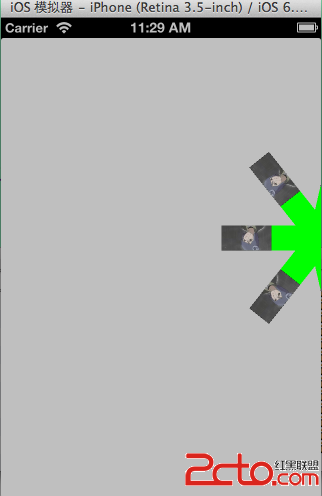
為了讓讀者看清楚,我將Cell中UILabel的背景色充為了light gray.下面是運行效果:

2. Auto Layout with UITextView in UITableViewCell
本小段教程將介紹UITextView在cell中計算高度需要注意的地方。同樣參考上面我們創建一個C2.xib, UITableViewCell的子類C2,並關聯C2.xib與C2類。並在C2.xib中對其布局,同樣使用了auto layout. 布局如下圖:

創始UITableViewController的了類T2ViewController,在Main.storyboard中拖入UITableViewController,並關聯他們。接著代碼中注冊C2.xib到UITableView.
下面計是計算高度的代碼:
- (CGFloat)tableView:(UITableView *)tableView heightForRowAtIndexPath:(NSIndexPath *)indexPath {
    C2 *cell = (C2 *)self.prototypeCell;
    cell.t.text = [self.tableData objectAtIndex:indexPath.row];
    CGSize size = [cell.contentView systemLayoutSizeFittingSize:UILayoutFittingCompressedSize];
    CGSize textViewSize = [cell.t sizeThatFits:CGSizeMake(cell.t.frame.size.width, FLT_MAX)];
    CGFloat h = size.height + textViewSize.height;
    h = h > 89 ? h : 89;  //89是圖片顯示的最低高度, 見xib
    NSLog(@"h=%f", h);
    return 1 + h;
}
在這兒我們是通過sizeThatFits:計算的UITextView的高度(這是計算UITextView內容全部顯示時的方法,在第四小段中我們還會用到它),然後加上systemLayoutSizeFittingSize:返回的高度。為什麼要這樣呢? 因為UITextView內容的高度不會影響systemLayoutSizeFittingSize計算。這句話什麼意思呢?我真不知道如何用言語表達了。還是先上一張圖吧:

此圖中距頂的約束是10, 距底的約束8, 距左邊約束是87,距右邊的約束是13, 那麼systemLayoutSizeFittingSize:返回的CGSize為height等於19, size等於100. 它UITextView的frame是不影響systemLayoutSizeFittingSize:的計算。不知道這樣說大家明白沒。
所以,我們需要加上textViewSize.height.
下面是運行效果:

3. Manual Layout with UILabel in UITableViewCell
本小段教程將介紹UILabel在Manual layout cell中計算高度, 原理是根據字體與字符串長度來計算長度與寬度。 按照前面介紹的,我們需要創建C3.xib, C3類, T3ViewController類,Main.storyboard中拖入UITableViewController,並分別建立關聯。 為了簡單,C3.xib中我就不加padding之類的了,如圖
記得關閉C3.xib的auto layout

直接上代碼了:
- (UITableViewCell *)tableView:(UITableView *)tableView cellForRowAtIndexPath:(NSIndexPath *)indexPath
{
    C3 *cell = [self.tableView dequeueReusableCellWithIdentifier:@"C3"];
    cell.t.text = [self.tableData objectAtIndex:indexPath.row];
    [cell.t sizeToFit];
    return cell;
}

- (CGFloat)tableView:(UITableView *)tableView heightForRowAtIndexPath:(NSIndexPath *)indexPath {
    C3 *cell = (C3 *)self.prototypeCell;
    NSString *str = [self.tableData objectAtIndex:indexPath.row];
    cell.t.text = str;
    CGSize s = [str calculateSize:CGSizeMake(cell.t.frame.size.width, FLT_MAX) font:cell.t.font];
    CGFloat defaultHeight = cell.contentView.frame.size.height;
    CGFloat height = s.height > defaultHeight ? s.height : defaultHeight;
    NSLog(@"h=%f", height);
    return 1  + height;
}
這兒用到了一個NSString的Cagetory方法:
- (CGSize)calculateSize:(CGSize)size font:(UIFont *)font {
    CGSize expectedLabelSize = CGSizeZero;

    if ([[[UIDevice currentDevice] systemVersion] floatValue] >= 7) {
        NSMutableParagraphStyle *paragraphStyle = [[NSMutableParagraphStyle alloc] init];
        paragraphStyle.lineBreakMode = NSLineBreakByWordWrapping;
        NSDictionary *attributes = @{NSFontAttributeName:font, NSParagraphStyleAttributeName:paragraphStyle.copy};

        expectedLabelSize = [self boundingRectWithSize:size options:NSStringDrawingUsesLineFragmentOrigin attributes:attributes context:nil].size;
    }
    else {
        expectedLabelSize = [self sizeWithFont:font
                                       constrainedToSize:size
                                           lineBreakMode:NSLineBreakByWordWrapping];
    }

    return CGSizeMake(ceil(expectedLabelSize.width), ceil(expectedLabelSize.height));
}
原理上面我已說了,這兒沒有什麼好說明的,代碼一目了然。
運行效果如圖:

4. Manual Layout with UITextView in UITableViewCell
本小段教程將介紹UITextView在Manual layout cell中計算高度, 原理是與第二小節裡的相同,用sizeThatFits:的方法計算UITextView的長度與高度。然後加上padding就是Cell的高度。 按照前面介紹的,我們需要創建C4.xib, C4類, T4ViewController類,Main.storyboard中拖入UITableViewController,並分別建立關聯。 為了簡單,C4.xib中我就不加padding之類的了,如圖
計得關閉C4.xib的auto layout

也直接上代碼了,直觀明了:
- (UITableViewCell *)tableView:(UITableView *)tableView cellForRowAtIndexPath:(NSIndexPath *)indexPath
{
    C4 *cell = [self.tableView dequeueReusableCellWithIdentifier:@"C4"];
    cell.t.text = [self.tableData objectAtIndex:indexPath.row];
    [cell.t sizeToFit];
    return cell;
}

- (CGFloat)tableView:(UITableView *)tableView heightForRowAtIndexPath:(NSIndexPath *)indexPath {
    C4 *cell = (C4 *)self.prototypeCell;
    NSString *str = [self.tableData objectAtIndex:indexPath.row];
    cell.t.text = str;
    CGSize s =  [cell.t sizeThatFits:CGSizeMake(cell.t.frame.size.width, FLT_MAX)];
    CGFloat defaultHeight = cell.contentView.frame.size.height;
    CGFloat height = s.height > defaultHeight ? s.height : defaultHeight;
    return 1  + height;
}
運行效果:

5.隨UITextView高度動態改變Cell高度
本小節要介紹的一個功能是,UITextView中UITableViewCell中,當輸入UITextView中的字變多/變少時,高度變化,Cell高度與隨之變化的功能。
按照前面介紹的,我們需要創建C5.xib, C5類, T5ViewController類,Main.storyboard中拖入UITableViewController,並分別建立關聯。 為了簡單,C5.xib中我就不加padding之類的了,如圖
記得開啟C5.xib的auto layout

先看代碼:
- (UITableViewCell *)tableView:(UITableView *)tableView cellForRowAtIndexPath:(NSIndexPath *)indexPath
{
    C5 *cell = [self.tableView dequeueReusableCellWithIdentifier:@"C5"];
    cell.t.text = @"123";
    cell.t.delegate = self;
    return cell;
}

#pragma mark - UITableViewDelegate
- (CGFloat)tableView:(UITableView *)tableView heightForRowAtIndexPath:(NSIndexPath *)indexPath {
    C5 *cell = (C5 *)self.prototypeCell;
    cell.t.text = self.updatedStr;
    CGSize s =  [cell.t sizeThatFits:CGSizeMake(cell.t.frame.size.width, FLT_MAX)];
    CGFloat defaultHeight = cell.contentView.frame.size.height;
    CGFloat height = s.height > defaultHeight ? s.height : defaultHeight;
    return 1  + height;
}

#pragma mark - UITextViewDelegate
- (BOOL)textView:(UITextView *)textView shouldChangeTextInRange:(NSRange)range replacementText:(NSString *)text {
    if ([text isEqualToString:@"n"]) {
        NSLog(@"h=%f", textView.contentSize.height);
    }
    return YES;
}

- (void)textViewDidChange:(UITextView *)textView {
    self.updatedStr = textView.text;
    [self.tableView beginUpdates];
    [self.tableView endUpdates];
}
原理就是UITextView內容改變的時候,計算自身高度,然後通知UITableView更新,這樣就會觸發UITableViewCell高度重新計算,以達到目的。
本文只是簡單的介紹了一些原理與技巧,細節之處還請參看源碼
時間倉促,難免有不少錯誤,還往指正。若有問題,請留言或加入iOS技術群: 433974986
參考:
http://www.howlin-interactive.com/2013/01/creating-a-self-sizing-uitextview-within-a-uitableviewcell-in-ios-6/ http://johnszumski.com/blog/auto-layout-for-table-view-cells-with-dynamic-heights http://technet.weblineindia.com/mobile/add-auto-layout-support-for-uiscrollview-with-example-in-ios-app-development/ http://useyourloaf.com/blog/2014/02/14/table-view-cells-with-varying-row-heights.html


- Xcode8+和iOS10+運用Masonry自動計算行高
- ios label 自動計算行高詳解
- 計算字符串的寬度與高度
- IOS 靜態方法與動態方法詳解
- IOS 通過tag刪除動態創建的UIButton
- iOS 動態改變UINavigationController的顏色和透明度
- iPhone 6s/6s Plus動態壁紙Live Photos導入導出圖文教程[多圖]
- Live Photos軟件怎麼使用? Live Photos動態屏保牆紙視頻教程[多圖]
- iOS9.2減弱動態效果有福利 新特性值得你升級一試[圖]
- 同時按AirDrop與拍照鍵真的會死機嗎?AirDrop和計算機鍵也會死機嗎[圖]
- iPhone迷人的新計算器應用:Rechner讓你愛上計算
- iphone gif格式圖片當動態桌面教程
- iphone計算器的使用
- iphone怎麼設置動態壁紙?
- PP助手計算機版設備管理之音樂