iOS10添加當地推送(Local Notification)實例
編輯:IOS開發綜合
媒介
IOS 10 中放棄了 UILocalNotification ( UIKit Framework ) 這個類,采取了全新的 UserNotifications Framework 來推送告訴,從此推送告訴也有了本身的標簽 UN (這待遇真是沒他人了),和對推送功效的一系列加強改良(兩個 extension 和 界面的體驗優化),的確是蘋果的親兒子,是以推送這部門功效同樣成為開辟中的重點。
本文重要檢查了 IOS 10 的相干文檔,整頓出了在 IOS 10 下的當地推送告訴,因為都是代碼,就不多做講授,直接看代碼及正文,有成績留言評論辯論哦。
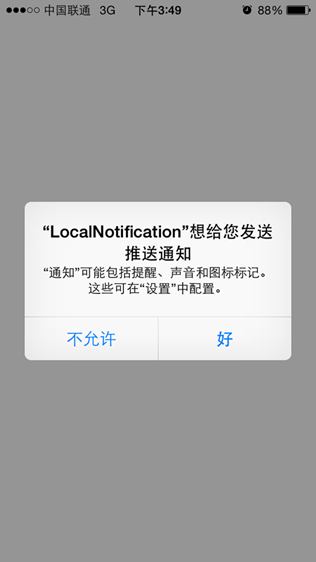
新的推送注冊機制
注冊告訴( Appdelegate.m ):
#import <UserNotifications/UserNotifications.h>
#import "AppDelegate.h"
@interface AppDelegate ()<UNUserNotificationCenterDelegate>

@end

@implementation AppDelegate

- (BOOL)application:(UIApplication *)application didFinishLaunchingWithOptions:(NSDictionary *)launchOptions {
 // 應用 UNUserNotificationCenter 來治理告訴
 UNUserNotificationCenter *center = [UNUserNotificationCenter currentNotificationCenter];
 //監聽回調事宜
 center.delegate = self;

 //iOS 10 應用以下辦法注冊,能力獲得受權
 [center requestAuthorizationWithOptions:(UNAuthorizationOptionAlert + UNAuthorizationOptionSound)
       completionHandler:^(BOOL granted, NSError * _Nullable error) {
        // Enable or disable features based on authorization.
       }];

 //獲得以後的告訴設置,UNNotificationSettings 是只讀對象,不克不及直接修正,只能經由過程以下辦法獲得
 [center getNotificationSettingsWithCompletionHandler:^(UNNotificationSettings * _Nonnull settings) {

 }];
 return YES;
}

#pragma mark - UNUserNotificationCenterDelegate
//在展現告訴進步行處置,即無機會在展現告訴前再修正告訴內容。
-(void)userNotificationCenter:(UNUserNotificationCenter *)center willPresentNotification:(UNNotification *)notification withCompletionHandler:(void (^)(UNNotificationPresentationOptions))completionHandler{
 //1. 處置告訴

 //2. 處置完成後條用 completionHandler ,用於指導在前台顯示告訴的情勢
 completionHandler(UNNotificationPresentationOptionAlert);
}
@end
推送當地告訴
//應用 UNNotification 當地告訴
+(void)registerNotification:(NSInteger )alerTime{

 // 應用 UNUserNotificationCenter 來治理告訴
 UNUserNotificationCenter* center = [UNUserNotificationCenter currentNotificationCenter];

 //需創立一個包括待告訴內容的 UNMutableNotificationContent 對象,留意不是 UNNotificationContent ,此對象為弗成變對象。
 UNMutableNotificationContent* content = [[UNMutableNotificationContent alloc] init];
 content.title = [NSString localizedUserNotificationStringForKey:@"Hello!" arguments:nil];
 content.body = [NSString localizedUserNotificationStringForKey:@"Hello_message_body"
 arguments:nil];
 content.sound = [UNNotificationSound defaultSound];

 // 在 alertTime 後推送當地推送
 UNTimeIntervalNotificationTrigger* trigger = [UNTimeIntervalNotificationTrigger
 triggerWithTimeInterval:alerTime repeats:NO];

 UNNotificationRequest* request = [UNNotificationRequest requestWithIdentifier:@"FiveSecond"
 content:content trigger:trigger];

 //添加推送勝利後的處置!
 [center addNotificationRequest:request withCompletionHandler:^(NSError * _Nullable error) {
  UIAlertController *alert = [UIAlertController alertControllerWithTitle:@"當地告訴" message:@"勝利添加推送" preferredStyle:UIAlertControllerStyleAlert];
  UIAlertAction *cancelAction = [UIAlertAction actionWithTitle:@"撤消" style:UIAlertActionStyleCancel handler:nil];
  [alert addAction:cancelAction];
  [[UIApplication sharedApplication].keyWindow.rootViewController presentViewController:alert animated:YES completion:nil];
 }];
}
iOS 10 之前當地推送告訴:
+ (void)registerLocalNotificationInOldWay:(NSInteger)alertTime {
 // ios8後,須要添加這個注冊,能力獲得受權
 // if ([[UIApplication sharedApplication] respondsToSelector:@selector(registerUserNotificationSettings:)]) {
 // UIUserNotificationType type = UIUserNotificationTypeAlert | UIUserNotificationTypeBadge | UIUserNotificationTypeSound;
 // UIUserNotificationSettings *settings = [UIUserNotificationSettings settingsForTypes:type
 // categories:nil];
 // [[UIApplication sharedApplication] registerUserNotificationSettings:settings];
 // // 告訴反復提醒的單元,可所以天、周、月
 // }

 UILocalNotification *notification = [[UILocalNotification alloc] init];
 // 設置觸發告訴的時光
 NSDate *fireDate = [NSDate dateWithTimeIntervalSinceNow:alertTime];
 NSLog(@"fireDate=%@",fireDate);

 notification.fireDate = fireDate;
 // 時區
 notification.timeZone = [NSTimeZone defaultTimeZone];
 // 設置反復的距離
 notification.repeatInterval = kCFCalendarUnitSecond;

 // 告訴內容
 notification.alertBody = @"該起床了...";
 notification.applicationIconBadgeNumber = 1;
 // 告訴被觸發時播放的聲響
 notification.soundName = UILocalNotificationDefaultSoundName;
 // 告訴參數
 NSDictionary *userDict = [NSDictionary dictionaryWithObject:@"開端進修iOS開辟了" forKey:@"key"];
 notification.userInfo = userDict;

 // ios8後,須要添加這個注冊,能力獲得受權
 if ([[UIApplication sharedApplication] respondsToSelector:@selector(registerUserNotificationSettings:)]) {
  UIUserNotificationType type = UIUserNotificationTypeAlert | UIUserNotificationTypeBadge | UIUserNotificationTypeSound;
  UIUserNotificationSettings *settings = [UIUserNotificationSettings settingsForTypes:type
                     categories:nil];
  [[UIApplication sharedApplication] registerUserNotificationSettings:settings];
  // 告訴反復提醒的單元,可所以天、周、月
  notification.repeatInterval = NSCalendarUnitDay;
 } else {
  // 告訴反復提醒的單元,可所以天、周、月
  notification.repeatInterval = NSDayCalendarUnit;
 }

 // 履行告訴注冊
 [[UIApplication sharedApplication] scheduleLocalNotification:notification];
}
本文已被整頓到了《iOS推送教程》,迎接年夜家進修浏覽。
以上就是本文的全體內容,願望對年夜家的進修有所贊助,也願望年夜家多多支撐本站。
【iOS10添加當地推送(Local Notification)實例】的相關資料介紹到這裡,希望對您有所幫助! 提示:不會對讀者因本文所帶來的任何損失負責。如果您支持就請把本站添加至收藏夾哦!
相關文章
+