iOS中的導航欄UINavigationBar與對象欄UIToolBar要點解析
1、導航欄UINavigationBar
1、導航欄的應用
在IOS開辟中,我們平日會應用導航掌握器,導航掌握器中封裝了一個UINavigationBar,現實上,我們也能夠在不應用導航掌握器的條件下,零丁應用導航欄,在UINavigationBar中,也有很多我們可以定制的屬性,用起來非常便利。
2、UINavigationBar的創立和作風類型
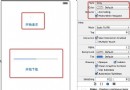
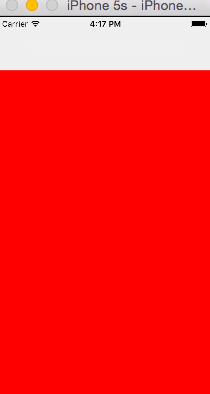
導航欄繼續於UIView,所以我們可以像創立通俗視圖那樣創立導航欄,好比我們創立一個高度為80的導航欄,將其放在ViewController的頭部,代碼以下:
UINavigationBar *bar = [[UINavigationBar alloc]initWithFrame:CGRectMake(0, 0, 320, 80)];後果以下:
[self.view addSubview:bar];
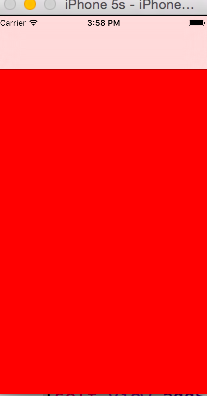
我們也能夠設置導航欄的作風屬性,從IOS6以後,UINavigationBar默許為半通明的款式,從下面也能夠看出,白色的導航欄上面顯露出些許配景的白色。導航欄的作風屬性可以經由過程上面的屬性來設置:
@property(nonatomic,assign) UIBarStyle barStyle;UIBarStyle是一個列舉,個中年夜部門的款式都已棄用,有用果的只要以下兩個:
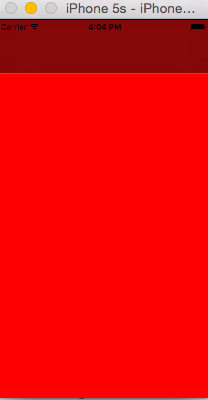
typedef NS_ENUM(NSInteger, UIBarStyle) {默許的作風就是我們下面看到的白色的作風,黑色的作風後果瑞以下:
UIBarStyleDefault = 0,//默許
UIBarStyleBlack = 1,//黑色
}
3、導航欄經常使用屬性和辦法
從下面我們可以看到,IOS6後導航欄默許都是半通明的,我們可以經由過程上面的bool值來設置這個屬性,設置為NO,則導航欄不通明,默許為YES:
@property(nonatomic,assign,getter=isTranslucent) BOOL translucent;上面一些辦法用於設置NavigationBar及下面item的色彩相干屬性:
@property(null_resettable, nonatomic,strong) UIColor *tintColor;tintColor這個屬性會影響到導航欄上左邊pop按鈕的圖案色彩和字體色彩,體系默許是以下色彩:

@property(nullable, nonatomic,strong) UIColor *barTintColor;BarTintColor用於設置導航欄的配景色,這個屬性被設置後,半通明的後果將掉效:
- (void)setBackgroundImage:(nullable UIImage *)backgroundImage forBarMetrics:(UIBarMetrics)barMetrics NS_AVAILABLE_IOS(5_0) UI_APPEARANCE_SELECTOR;下面兩個辦法用於設置和獲得導航欄的配景圖案,這裡須要留意,默許配景圖案是不做縮放處置的,所以我們應用的圖片尺寸要和導航欄尺寸婚配,這外面還有一個UIBarMetrics參數,這個參數設置裝備的狀況,以下:
- (nullable UIImage *)backgroundImageForBarMetrics:(UIBarMetrics)barMetrics;
typedef NS_ENUM(NSInteger, UIBarMetrics) {題目字體屬性會影響到導航欄的中央題目,以下:
UIBarMetricsDefault,//正常豎屏狀況
UIBarMetricsCompact,//橫屏狀況
};
//設置導航欄的暗影圖片
@property(nullable, nonatomic,strong) UIImage *shadowImage;
//設置導航欄的題目字體屬性
@property(nullable,nonatomic,copy) NSDictionary<NSString *,id> *titleTextAttributes;
bar.titleTextAttributes = @{NSForegroundColorAttributeName:[UIColor redColor]};
我們也能夠經由過程上面的屬性設置導航欄題目的豎直地位偏移:
- (void)setTitleVerticalPositionAdjustment:(CGFloat)adjustment forBarMetrics:(UIBarMetrics)barMetrics;還有一個細節,導航欄左邊pop按鈕的圖案默許是一個箭頭,我們可使用上面的辦法修正:
- (CGFloat)titleVerticalPositionAdjustmentForBarMetrics:(UIBarMetrics)barMetrics;
@property(nullable,nonatomic,strong) UIImage *backIndicatorImage;4、導航欄中item的push與pop操作
@property(nullable,nonatomic,strong) UIImage *backIndicatorTransitionMaskImage;
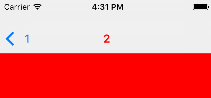
UINavigationBar下面不只是簡略的顯示題目,它也將題目停止了客棧的治理,每個題目籠統為的對象在iOS體系中是UINavigationItem對象,我們可以經由過程push與pop操作治理item組。
//向棧中添加一個item,上一個item會被推領導航欄的左邊,變成pop按鈕,會有一個動畫後果5、UINavigationBarDelegate
- (void)pushNavigationItem:(UINavigationItem *)item animated:(BOOL)animated;
//pop一個item
- (nullable UINavigationItem *)popNavigationItemAnimated:(BOOL)animated;
//以後push到最下層的item
@property(nullable, nonatomic,readonly,strong) UINavigationItem *topItem;
//僅次於最下層的item,普通式被推領導航欄左邊的item
@property(nullable, nonatomic,readonly,strong) UINavigationItem *backItem;
//獲得客棧中一切item的數組
@property(nullable,nonatomic,copy) NSArray<UINavigationItem *> *items;
//設置一組item
- (void)setItems:(nullable NSArray<UINavigationItem *> *)items animated:(BOOL)animated;
在UINavigationBar中,還有以下一個屬性:
@property(nullable,nonatomic,weak) id<UINavigationBarDelegate> delegate;經由過程署理,我們可以監控導航欄的一些push與pop操作:
//item將要push的時刻挪用,前往NO,則不克不及push

- (BOOL)navigationBar:(UINavigationBar *)navigationBar shouldPushItem:(UINavigationItem *)item;

//item曾經push後挪用

- (void)navigationBar:(UINavigationBar *)navigationBar didPushItem:(UINavigationItem *)item;

//item將要pop時挪用,前往NO,不克不及pop

- (BOOL)navigationBar:(UINavigationBar *)navigationBar shouldPopItem:(UINavigationItem *)item;

//item曾經pop後挪用

- (void)navigationBar:(UINavigationBar *)navigationBar didPopItem:(UINavigationItem *)item;
2、對象欄UIToolBar
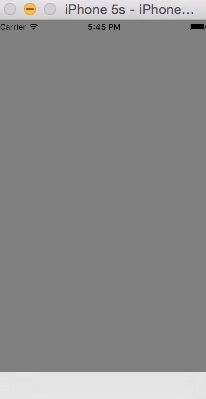
導航欄普通會湧現在視圖的頭部,與之絕對,對象欄普通會湧現在視圖的的底部,下面可以填充一些按鈕,供給給用戶一些操作。創立一個對象欄以下:
self.view.backgroundColor = [UIColor grayColor];

UIToolbar * tool = [[UIToolbar alloc]initWithFrame:CGRectMake(0, self.view.frame.size.height-40, 320, 40)];

[self.view addSubview:tool];
上面是UIToolBar中的一些辦法,個中年夜部門在UINavigationBar中都有觸及,這裡只做簡略的引見:
//對象欄的作風,和導航欄相似,有诟谇兩種

@property(nonatomic) UIBarStyle barStyle;

//設置對象欄上按鈕數組

@property(nullable,nonatomic,copy) NSArray<UIBarButtonItem *> *items;

//設置對象欄能否通明

@property(nonatomic,assign,getter=isTranslucent) BOOL translucent;

//設置對象欄按鈕

- (void)setItems:(nullable NSArray<UIBarButtonItem *> *)items animated:(BOOL)animated;

//設置item作風色彩

@property(null_resettable, nonatomic,strong) UIColor *tintColor;

//設置對象欄配景色

@property(nullable, nonatomic,strong) UIColor *barTintColor;

//設置對象欄配景和暗影圖案

- (void)setBackgroundImage:(nullable UIImage *)backgroundImage forToolbarPosition:(UIBarPosition)topOrBottom barMetrics:(UIBarMetrics)barMetrics;

- (nullable UIImage *)backgroundImageForToolbarPosition:(UIBarPosition)topOrBottom barMetrics:(UIBarMetrics)barMetrics;

- (void)setShadowImage:(nullable UIImage *)shadowImage forToolbarPosition:(UIBarPosition)topOrBottom;

- (nullable UIImage *)shadowImageForToolbarPosition:(UIBarPosition)topOrBottom;
【iOS中的導航欄UINavigationBar與對象欄UIToolBar要點解析】的相關資料介紹到這裡,希望對您有所幫助! 提示:不會對讀者因本文所帶來的任何損失負責。如果您支持就請把本站添加至收藏夾哦!