講解iOS開發中對音效和音樂播放的簡單實現
音效的播放
一、簡單介紹
簡單來說,音頻可以分為2種
(1)音效
又稱“短音頻”,通常在程序中的播放時長為1~2秒
在應用程序中起到點綴效果,提升整體用戶體驗
(2)音樂
比如游戲中的“背景音樂”,一般播放時間較長
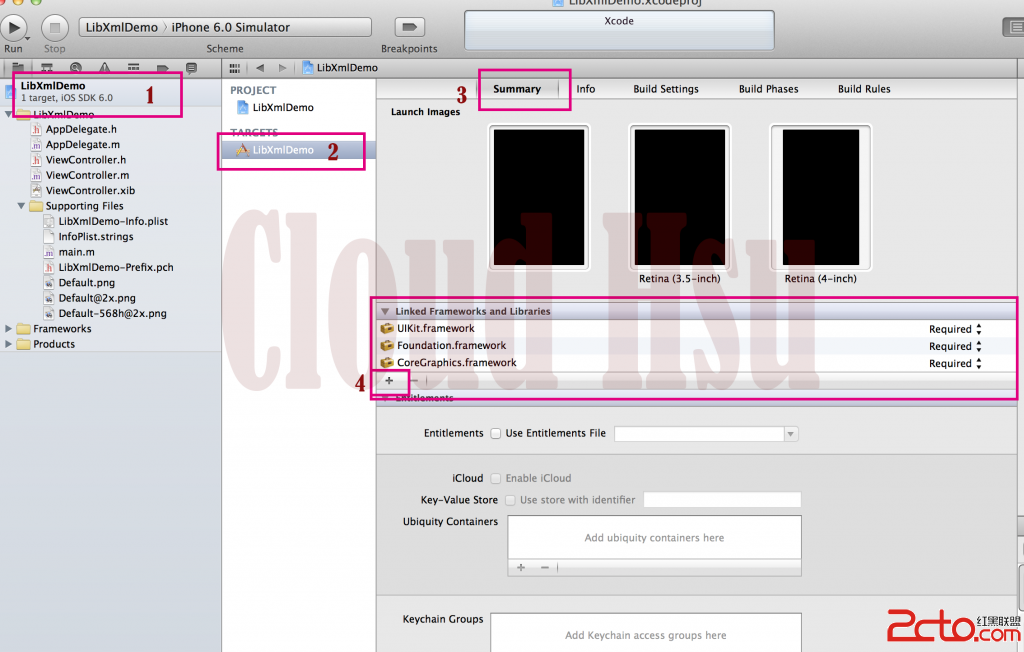
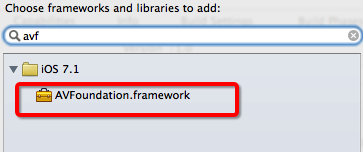
框架:播放音頻需要用到AVFoundation.framework框架
二、音效的播放
1.獲得音效文件的路徑
復制代碼 代碼如下:
NSURL *url = [[NSBundle mainBundle] URLForResource:@"m_03.wav" withExtension:nil];
2.加載音效文件,得到對應的音效ID
復制代碼 代碼如下:
SystemSoundID soundID = 0;
AudioServicesCreateSystemSoundID((__bridge CFURLRef)(url), &soundID);
3.播放音效
復制代碼 代碼如下:
AudioServicesPlaySystemSound(soundID);
注意:音效文件只需要加載1次
4.音效播放常見函數總結
加載音效文件
復制代碼 代碼如下:
AudioServicesCreateSystemSoundID(CFURLRef inFileURL, SystemSoundID *outSystemSoundID)
釋放音效資源
復制代碼 代碼如下:
AudioServicesDisposeSystemSoundID(SystemSoundID inSystemSoundID)
播放音效
復制代碼 代碼如下:
AudioServicesPlaySystemSound(SystemSoundID inSystemSoundID)
播放音效帶點震動
復制代碼 代碼如下:
AudioServicesPlayAlertSound(SystemSoundID inSystemSoundID)
三、程序示例
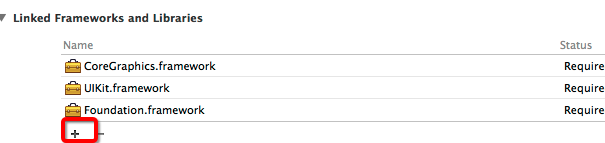
先導入需要依賴的框架
導入需要播放的音效文件素材
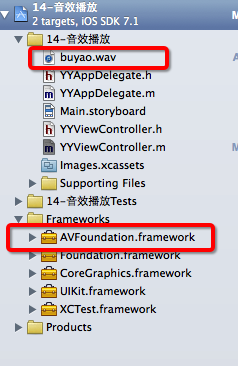
說明:AVFoundation.framework框架中的東西轉換為CF需要使用橋接。
代碼示例:
復制代碼 代碼如下:
YYViewController.m文件
//
// YYViewController.m
// 14-音效播放
//
// Created by apple on 14-8-8.
// Copyright (c) 2014年 yangyong. All rights reserved.
//
#import "YYViewController.h"
#import <AVFoundation/AVFoundation.h>
@interface YYViewController ()
@end
復制代碼 代碼如下:
@implementation YYViewController
- (void)viewDidLoad
{
[super viewDidLoad];
}
-(void)touchesBegan:(NSSet *)touches withEvent:(UIEvent *)event
{
//1.獲得音效文件的全路徑
NSURL *url=[[NSBundle mainBundle]URLForResource:@"buyao.wav" withExtension:nil];
//2.加載音效文件,創建音效ID(SoundID,一個ID對應一個音效文件)
SystemSoundID soundID=0;
AudioServicesCreateSystemSoundID((__bridge CFURLRef)url, &soundID);
//把需要銷毀的音效文件的ID傳遞給它既可銷毀
//AudioServicesDisposeSystemSoundID(soundID);
//3.播放音效文件
//下面的兩個函數都可以用來播放音效文件,第一個函數伴隨有震動效果
AudioServicesPlayAlertSound(soundID);
//AudioServicesPlaySystemSound(<#SystemSoundID inSystemSoundID#>)
}
@end
說明:點擊屏幕可以播放音效文件。
音樂的播放
一、簡單說明
音樂播放用到一個叫做AVAudioPlayer的類,這個類可以用於播放手機本地的音樂文件。
注意:
(1)該類(AVAudioPlayer)只能用於播放本地音頻。
(2)時間比較短的(稱之為音效)使用AudioServicesCreateSystemSoundID來創建,而本地時間較長(稱之為音樂)使用AVAudioPlayer類。
二、代碼示例
AVAudioPlayer類依賴於AVFoundation框架,因此使用該類必須先導入AVFoundation框架,並包含其頭文件(包含主頭文件即可)。

導入必要的,需要播放的音頻文件到項目中。
代碼示例:
復制代碼 代碼如下:
//
// YYViewController.m
// 15-播放音樂
//
#import "YYViewController.h"
#import <AVFoundation/AVFoundation.h>
@interface YYViewController ()
@end
復制代碼 代碼如下:
@implementation YYViewController
- (void)viewDidLoad
{
[super viewDidLoad];
}
-(void)touchesBegan:(NSSet *)touches withEvent:(UIEvent *)event
{
//1.音頻文件的url路徑
NSURL *url=[[NSBundle mainBundle]URLForResource:@"235319.mp3" withExtension:Nil];
//2.創建播放器(注意:一個AVAudioPlayer只能播放一個url)
AVAudioPlayer *audioPlayer=[[AVAudioPlayer alloc]initWithContentsOfURL:url error:Nil];
//3.緩沖
[audioPlayer prepareToPlay];
//4.播放
[audioPlayer play];
}
@end
代碼說明:運行程序,點擊模擬器界面,卻並沒有能夠播放音頻文件,原因是代碼中創建的AVAudioPlayer播放器是一個局部變量,應該調整為全局屬性。
可將代碼調整如下,即可播放音頻:
復制代碼 代碼如下:
#import "YYViewController.h"
#import <AVFoundation/AVFoundation.h>
@interface YYViewController ()
@property(nonatomic,strong)AVAudioPlayer *audioplayer;
@end
復制代碼 代碼如下:
@implementation YYViewController
- (void)viewDidLoad
{
[super viewDidLoad];
}
-(void)touchesBegan:(NSSet *)touches withEvent:(UIEvent *)event
{
//1.音頻文件的url路徑
NSURL *url=[[NSBundle mainBundle]URLForResource:@"235319.mp3" withExtension:Nil];
//2.創建播放器(注意:一個AVAudioPlayer只能播放一個url)
self.audioplayer=[[AVAudioPlayer alloc]initWithContentsOfURL:url error:Nil];
//3.緩沖
[self.audioplayer prepareToPlay];
//4.播放
[self.audioplayer play];
}
@end
注意:一個AVAudioPlayer只能播放一個url,如果想要播放多個文件,那麼就得創建多個播放器。
三、相關說明
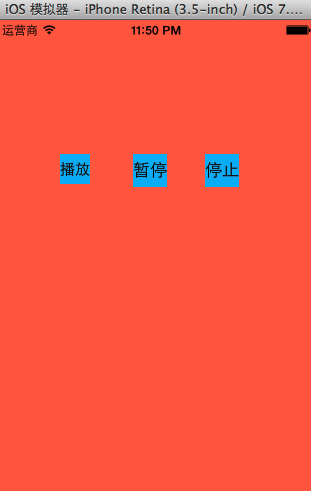
新建一個項目,在storyboard中放三個按鈕,分別用來控制音樂的播放、暫停和停止。
程序代碼如下:
復制代碼 代碼如下:
#import "YYViewController.h"
#import <AVFoundation/AVFoundation.h>
@interface YYViewController ()
@property(nonatomic,strong)AVAudioPlayer *player;
- (IBAction)play;
- (IBAction)pause;
- (IBAction)stop;
@end
@implementation YYViewController
- (void)viewDidLoad
{
[super viewDidLoad];
//1.音頻文件的url路徑
NSURL *url=[[NSBundle mainBundle]URLForResource:@"235319.mp3" withExtension:Nil];
//2.創建播放器(注意:一個AVAudioPlayer只能播放一個url)
self.player=[[AVAudioPlayer alloc]initWithContentsOfURL:url error:Nil];
//3.緩沖
[self.player prepareToPlay];
}
- (IBAction)play {
//開始播放/繼續播放
[self.player play];
}
- (IBAction)pause {
//暫停
[self.player pause];
}
- (IBAction)stop {
//停止
//注意:如果點擊了stop,那麼一定要讓播放器重新創建,否則會出現一些莫名其面的問題
[self.player stop];
}
@end
注意:如果點了“停止”,那麼一定要播放器重新創建,不然的話會出現莫名其妙的問題。
點擊了stop之後,播放器實際上就不能再繼續使用了,如果還繼續使用,那麼後續的一些東西會無法控制。
推薦代碼:
復制代碼 代碼如下:
#import "YYViewController.h"
#import <AVFoundation/AVFoundation.h>
@interface YYViewController ()
@property(nonatomic,strong)AVAudioPlayer *player;
- (IBAction)play;
- (IBAction)pause;
- (IBAction)stop;
@end
復制代碼 代碼如下:
@implementation YYViewController
#pragma mark-懶加載
-(AVAudioPlayer *)player
{
if (_player==Nil) {
//1.音頻文件的url路徑
NSURL *url=[[NSBundle mainBundle]URLForResource:@"235319.mp3" withExtension:Nil];
//2.創建播放器(注意:一個AVAudioPlayer只能播放一個url)
self.player=[[AVAudioPlayer alloc]initWithContentsOfURL:url error:Nil];
//3.緩沖
[self.player prepareToPlay];
}
return _player;
}
- (void)viewDidLoad
{
[super viewDidLoad];
}
- (IBAction)play {
//開始播放/繼續播放
[self.player play];
}
- (IBAction)pause {
//暫停
[self.player pause];
}
- (IBAction)stop {
//停止
//注意:如果點擊了stop,那麼一定要讓播放器重新創建,否則會出現一些莫名其面的問題
[self.player stop];
self.player=Nil;
}
@end
四、播放多個文件

點擊,url,按住common建查看。

可以發現,這個url是只讀的,因此只能通過initWithContentsOfUrl的方式進行設置,也就意味著一個播放器對象只能播放一個音頻文件。
那麼如何實現播放多個音頻文件呢?
可以考慮封裝一個播放音樂的工具類,下一篇文章將會介紹具體怎麼實現。