#IOS-navigation中左滑pop的三種方法
編輯:IOS開發綜合
IOS-navigation中左滑pop的三種方法
系統自帶pop方法
如果我們沒有對navigation中的back按鈕進行自定義,我們可以直接使用系統自帶的左滑pop方法。但是如果我們對back按鈕,進行了自定義,我們就要對self.navigationController.interactivePopGestureRecognizer這個屬性進行設置了。
關鍵代碼
__weak typeof(self) weakSelf = self;
self.navigationController.interactivePopGestureRecognizer.delegate =
weakSelf;
下面是實例代碼:
(繼承AbeViewController類,就可以使用系統自帶的pop方法。)
#import "AbeViewController.h"
@interface AbeViewController ()
@end
@implementation AbeViewController
- (void)viewDidLoad {
[super viewDidLoad];
}
- (void)viewDidAppear:(BOOL)animated{
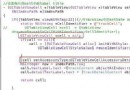
//**************方法一****************//
//設置滑動回退
__weak typeof(self) weakSelf = self; self.navigationController.interactivePopGestureRecognizer.delegate = weakSelf;
//判斷是否為第一個view
if (self.navigationController && [self.navigationController.viewControllers count] == 1) {
self.navigationController.interactivePopGestureRecognizer.enabled = NO;
}
}
#pragma mark- UIGestureRecognizerDelegate
//**************方法一****************//
- (BOOL)gestureRecognizerShouldBegin:(UIGestureRecognizer *)gestureRecognizer{
return YES;
}
@end
自定義邊緣左滑手勢方法
就是實現了一個手勢方法,觸發這個手勢方法時pop。
下面是實例代碼:
(繼承AbeViewController類,就可以使用自定義邊緣左滑手勢的pop方法。)
#import "AbeViewController.h"

@interface AbeViewController ()

@end

@implementation AbeViewController

- (void)viewDidLoad {
    [super viewDidLoad];
}

- (void)viewDidAppear:(BOOL)animated{
    //*************方法二*****************//
    UIScreenEdgePanGestureRecognizer *edgePanGestureRecognizer = [[UIScreenEdgePanGestureRecognizer alloc] initWithTarget:self action:@selector(edgePanGesture:)];
    edgePanGestureRecognizer.delegate = self;
    edgePanGestureRecognizer.edges = UIRectEdgeLeft;
    [self.view addGestureRecognizer:edgePanGestureRecognizer];
}

- (void)didReceiveMemoryWarning {
    [super didReceiveMemoryWarning];
}

#pragma mark- private method
//*************方法二*****************//
- (void)edgePanGesture:(UIScreenEdgePanGestureRecognizer*)edgePanGestureRecognizer{
    [self.navigationController popViewControllerAnimated:YES];
}

#pragma mark- UIGestureRecognizerDelegate
//**************方法二****************//
- (BOOL)gestureRecognizerShouldBegin:(UIGestureRecognizer *)gestureRecognizer{
    if (self.navigationController && [self.navigationController.viewControllers count] == 1) {
        return NO;
    }
    return YES;
}

@end
自定義view任何位置左移pop
在view中,任何位置左移觸發pop方法。
其實就是建立了一個UIPanGestureRecognizer手勢,然後該手勢觸發方法。
知識點:
[panGestureRecognizer locationInView:XX] 獲取pan手勢的CGPoint。
panGestureRecognizer.state pan的狀態
self.interactivePopGestureRecognizer.enabled = NO; 原生左滑無效
下面是實例代碼:
(繼承ABENavViewController類,就可以使用自定義view左滑手勢的pop方法; ABENavViewController為UINavigationController的子類)
#import "ABENavViewController.h"

@interface ABENavViewController ()

@property (strong, nonatomic)UIPanGestureRecognizer *panGestureRecognizer;
@property (strong, nonatomic)UIImageView *backView;

@property (strong, nonatomic)NSMutableArray *backImgs;
@property (assign) CGPoint panBeginPoint;
@property (assign) CGPoint panEndPoint;

@end

@implementation ABENavViewController
- (instancetype)initWithNibName:(NSString *)nibNameOrNil bundle:(NSBundle *)nibBundleOrNil{
    self = [super initWithNibName:nibNameOrNil bundle:nibBundleOrNil];
    if (self) {
        //initlization
    }
    return self;
}

- (void)loadView{
    [super loadView];

    [self initilization];
}

- (void)viewDidLoad {
    [super viewDidLoad];
    [self loadBaseUI];
}

- (void)initilization{
    self.backImgs = [[NSMutableArray alloc] init];
}

- (void)loadBaseUI{
    //原生方法無效
    self.interactivePopGestureRecognizer.enabled = NO;

    //設置手勢
    self.panGestureRecognizer = [[UIPanGestureRecognizer alloc] initWithTarget:self action:@selector(panGestureRecognizerAction:)];
    [self.view addGestureRecognizer:self.panGestureRecognizer];
}

#pragma mark- public method
- (void)pushViewController:(UIViewController *)viewController animated:(BOOL)animated{
    //截圖
    UIGraphicsBeginImageContextWithOptions([UIScreen mainScreen].bounds.size, YES, 1.0);
    [[UIApplication sharedApplication].keyWindow.layer renderInContext:UIGraphicsGetCurrentContext()];
    UIImage *img = UIGraphicsGetImageFromCurrentImageContext();
    UIGraphicsEndImageContext();
    [self.backImgs addObject:img];

    [super pushViewController:viewController animated:animated];
}

- (UIViewController *)popViewControllerAnimated:(BOOL)animated{
    [_backImgs removeLastObject];

    return [super popViewControllerAnimated:animated];
}

#pragma mark- private method
- (void)panGestureRecognizerAction:(UIPanGestureRecognizer*)panGestureRecognizer{
    if ([self.viewControllers count] == 1) {
        return ;
    }

    if (panGestureRecognizer.state == UIGestureRecognizerStateBegan) {
        NSLog(@"滑動開始");
        //存放滑動開始的位置
        self.panBeginPoint = [panGestureRecognizer locationInView:[UIApplication sharedApplication].keyWindow];
        //插入圖片
        [self insertLastViewFromSuperView:self.view.superview];

    }else if(panGestureRecognizer.state == UIGestureRecognizerStateEnded){
        NSLog(@"滑動結束");
        //存放數據
        self.panEndPoint = [panGestureRecognizer locationInView:[UIApplication sharedApplication].keyWindow];

        if ((_panEndPoint.x - _panBeginPoint.x) > 50) {
            [UIView animateWithDuration:0.3 animations:^{
                [self moveNavigationViewWithLenght:[UIScreen mainScreen].bounds.size.width];
            } completion:^(BOOL finished) {
                [self removeLastViewFromSuperView];
                [self moveNavigationViewWithLenght:0];
                [self popViewControllerAnimated:NO];
            }];


        }else{
            [UIView animateWithDuration:0.3 animations:^{
                [self moveNavigationViewWithLenght:0];
            }];
        }
    }else{
        //添加移動效果
        CGFloat panLength = ([panGestureRecognizer locationInView:[UIApplication sharedApplication].keyWindow].x - _panBeginPoint.x);
        if (panLength > 0) {
            [self moveNavigationViewWithLenght:panLength];
        }
    }

}

/**
 *  移動視圖界面
 *
 *  @param lenght 移動的長度
 */
- (void)moveNavigationViewWithLenght:(CGFloat)lenght{

    //圖片位置設置
    self.view.frame = CGRectMake(lenght, self.view.frame.origin.y, self.view.frame.size.width, self.view.frame.size.height);
    //圖片動態陰影
    _backView.alpha = (lenght/[UIScreen mainScreen].bounds.size.width)*2/3 + 0.33;
}

/**
 *  插圖上一級圖片
 *
 *  @param superView 圖片的superView
 */
- (void)insertLastViewFromSuperView:(UIView *)superView{
    //插入上一級視圖背景
    if (_backView == nil) {
        _backView = [[UIImageView alloc] initWithFrame:[UIScreen mainScreen].bounds];
        _backView.image = [_backImgs lastObject];;
    }
    [self.view.superview insertSubview:_backView belowSubview:self.view];
}

/**
 *  移除上一級圖片
 */
- (void)removeLastViewFromSuperView{
    [_backView removeFromSuperview];
    _backView = nil;
}

@end
- 上一頁:iOS的UIButton和UILable
- 下一頁:iOS圖片上傳及處理
相關文章
+