iOS UITableView(二)
本文主要內容:
1.純代碼創建自定義cell;
2.Xib創建自定義cell.
自定義Cell
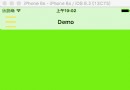
自定義cell的樣式,效果圖:

1.純代碼方式自定義cell
Swift版:
在項目中新建一個Cocoa Touch Class文件,取名為:MyCell,繼承自UITableViewCell.
進入創建好的MyCell.swift文件,聲明要顯示到cell上的控件:

然後重寫cell的init方法,在init方法中定義上面創建的控件的各種屬性,並把控件添加到頁面上:
// 重寫init方法
override init(style: UITableViewCellStyle, reuseIdentifier: String?) {
    super.init(style: style, reuseIdentifier: reuseIdentifier)

    // 創建圖片:cellImage,並添加到cell上
    let imageX: CGFloat = 10
    let imageY: CGFloat = 10
    let imageWidth: CGFloat = 100
    let imageHeight: CGFloat = 100
    cellImage = UIImageView(frame: CGRectMake(imageX, imageY, imageWidth, imageHeight))
    cellImage.backgroundColor = UIColor.redColor()
    self.addSubview(cellImage)

    // 創建標題:cellTitle,並添加到cell上
    let titleX: CGFloat = CGRectGetMaxX(cellImage.frame) + 10
    let titleY: CGFloat = 10
    let titleWidth: CGFloat = self.frame.size.width - titleX
    let titleHeight: CGFloat = 20
    cellTitle = UILabel(frame: CGRectMake(titleX, titleY, titleWidth, titleHeight))
    cellTitle.text = "cell的標題"
    cellTitle.font = UIFont.systemFontOfSize(18)
    self.addSubview(cellTitle)

    // 創建內容:cellText,並添加到cell上
    let textX: CGFloat = cellTitle.frame.origin.x
    let textY: CGFloat = CGRectGetMaxY(cellTitle.frame) + 10
    let textWidth: CGFloat = titleWidth
    let textHeight: CGFloat = 50
    cellText = UILabel(frame: CGRectMake(textX, textY, textWidth, textHeight))
    cellText.text = "cell的內容xxxxxxxxxxxxxxxxxxxxxxxxxxxxxxxxxxxxxxxxxxxxx"
    cellText.font = UIFont.systemFontOfSize(12)
    cellText.numberOfLines = 0
    self.addSubview(cellText)

    // 創建日期:cellDate,並添加到cell上
    let dateX: CGFloat = 10
    let dateY: CGFloat = CGRectGetMaxY(cellImage.frame) + 10
    let dateWidth: CGFloat = self.frame.size.width - dateX*2
    let dateHeight: CGFloat = 20
    cellDate = UILabel(frame: CGRectMake(dateX, dateY, dateWidth, dateHeight))
    cellDate.text = "日期:2016-06-30"
    cellDate.font = UIFont.systemFontOfSize(12)
    self.addSubview(cellDate)
}
required init?(coder aDecoder: NSCoder) {
    fatalError("init(coder:) has not been implemented")
}
MyCell.swift的工作完畢,現在進入UITableview的數據源實現方法裡,在創建cell的地方創建一個MyCell的對象即可。
func tableView(tableView: UITableView, cellForRowAtIndexPath indexPath: NSIndexPath) -> UITableViewCell {
    // 創建一個cellID,用於cell的重用
    let cellID = "cellID"
    // 從tableview的重用池裡通過cellID取一個cell
    var cell = tableView.dequeueReusableCellWithIdentifier(cellID)
    if (cell == nil) {
        // 如果tableview的重用池中沒有取到,就創建一個新的cell,style為Value2,並用cellID對其進行標記。
        cell = MyCell(style: .Value2, reuseIdentifier: cellID)
    }
    return cell!
}
最後一步:設置cell的高度
// 設置 cell 的高度
func tableView(tableView: UITableView, heightForRowAtIndexPath indexPath: NSIndexPath) -> CGFloat {
    // 這個數值是根據自定義cell的高度來計算出來的
    return 140
}
Objective-C版:
在項目中新建一個Cocoa Touch Class文件,取名為:MyCell,繼承自UITableViewCell.
進入創建好的MyCell.h文件,聲明要顯示到cell上的控件:

然後進入MyCell.m文件,重寫cell的init方法,在init方法中定義上面創建的控件的各種屬性,並把控件添加到頁面上:
// 重寫init方法
- (instancetype)initWithStyle:(UITableViewCellStyle)style reuseIdentifier:(NSString *)reuseIdentifier {
    if (self = [super initWithStyle:style reuseIdentifier:reuseIdentifier]) {

        // 創建圖片:cellImage,並添加到cell上
        CGFloat imageX = 10;
        CGFloat imageY = 10;
        CGFloat imageWidth = 100;
        CGFloat imageHeight = 100;
        self.cellImage = [[UIImageView alloc] initWithFrame:CGRectMake(imageX, imageY, imageWidth, imageHeight)];
        self.cellImage.backgroundColor = [UIColor redColor];
        [self addSubview:self.cellImage];

        // 創建標題:cellTitle,並添加到cell上
        CGFloat titleX = CGRectGetMaxX(self.cellImage.frame) + 10;
        CGFloat titleY = 10;
        CGFloat titleWidth = self.frame.size.width - titleX;
        CGFloat titleHeight = 20;
        self.cellTitle = [[UILabel alloc] initWithFrame: CGRectMake(titleX, titleY, titleWidth, titleHeight)];
        self.cellTitle.text = @"cell的標題";
        self.cellTitle.font = [UIFont systemFontOfSize:18];
        [self addSubview:self.cellTitle];

        // 創建內容:cellText,並添加到cell上
        CGFloat textX = self.cellTitle.frame.origin.x;
        CGFloat textY = CGRectGetMaxY(self.cellTitle.frame) + 10;
        CGFloat textWidth = titleWidth;
        CGFloat textHeight = 50;
        self.cellText = [[UILabel alloc] initWithFrame:CGRectMake(textX, textY, textWidth, textHeight)];
        self.cellText.text = @"cell的內容xxxxxxxxxxxxxxxxxxxxxxxxxxxxxxxxxxxxxxxxxxxxx";
        self.cellText.font = [UIFont systemFontOfSize:12];
        self.cellText.numberOfLines = 0;
        [self addSubview:self.cellText];

        // 創建日期:cellDate,並添加到cell上
        CGFloat dateX = 10;
        CGFloat dateY = CGRectGetMaxY(self.cellImage.frame) + 10;
        CGFloat dateWidth = self.frame.size.width - dateX*2;
        CGFloat dateHeight = 20;
        self.cellDate = [[UILabel alloc] initWithFrame:CGRectMake(dateX, dateY, dateWidth, dateHeight)];
        self.cellDate.text = @"2016-06-30";
        self.cellDate.font = [UIFont systemFontOfSize:12];
        [self addSubview:self.cellDate];
    }
    return self;
}
MyCell的工作完畢,現在進入UITableview的數據源實現方法裡,在創建cell的地方創建一個MyCell的對象即可。
// 設置 Cell
-(UITableViewCell *)tableView:(UITableView *)tableView cellForRowAtIndexPath:(NSIndexPath *)indexPath {
    // 創建一個cellID,用於cell的重用
    NSString *cellID = @"cellID";
    // 從tableview的重用池裡通過cellID取一個cell
    UITableViewCell *cell = [tableView dequeueReusableCellWithIdentifier:cellID];
    if (cell == nil) {
        // 如果tableview的重用池中沒有取到,就創建一個新的cell,style為Value2,並用cellID對其進行標記。
        cell = [[MyCell alloc] initWithStyle:UITableViewCellStyleValue2 reuseIdentifier:cellID];
    }
    return cell;
}
最後一步:設置cell的高度
// 設置 cell 的高度
-(CGFloat)tableView:(UITableView *)tableView heightForRowAtIndexPath:(NSIndexPath *)indexPath {
    // 這個數值是根據自定義cell的高度來計算出來的
    return 140;
}
現在運行一下程序,應該會看到文章開頭的效果圖。
2.使用Xib方式自定義cell
Swift版:
在項目中新建一個Cocoa Touch Class文件,取名為:MyCellWithXib,繼承自UITableViewCell,勾選”Also create XIB file”。
進入創建好的MyCellWithXib.swift文件,聲明要顯示到cell上的控件:

點擊MyCellWithXib.xib文件,進入xib界面,將要要添加的控件拖到xib界面上。

然後將界面上的控件和MyCellWithXib.swift文件中聲明的控件連線

如果需要代碼控制某個控件的屬性,就在MyCellWithXib.swift中重寫cell的init方法,在init方法中控制某個控件的屬性:
// 重寫init方法
override init(style: UITableViewCellStyle, reuseIdentifier: String?) {
    super.init(style: style, reuseIdentifier: reuseIdentifier)
    // 在此控制控件的屬性
    // ......
}
required init?(coder aDecoder: NSCoder) {
    fatalError("init(coder:) has not been implemented")
}
MyCellWithXib的工作完畢,現在進入創建UITableview的代碼處,增加一個Xib的聲明:
// 創建一個cell重用的ID
let cellID = "cellID"
// 對tableView注冊xib
tableView.registerNib(UINib(nibName: "MyCellWithXib", bundle: nil), forCellReuseIdentifier: cellID)
然後找到tableView實現數據源的方法:
// 設置 Cell
func tableView(tableView: UITableView, cellForRowAtIndexPath indexPath: NSIndexPath) -> UITableViewCell {
    // 創建一個cell重用的ID(這裡的cellID必須和上面對tableView注冊xib時的cellID一致)
    let cellID = "cellID"
    // 創建一個MyCellWithXib的cell
    let cell: MyCellWithXib = tableView.dequeueReusableCellWithIdentifier(cellID, forIndexPath: indexPath) as! MyCellWithXib
    return cell
}
最後一步:設置cell的高度
// 設置 cell 的高度
func tableView(tableView: UITableView, heightForRowAtIndexPath indexPath: NSIndexPath) -> CGFloat {
    // 這個數值是根據自定義cell的高度來計算出來的
    return 140
}
完畢,運行一下,就會看到自定義的cell
Objective-C版:
在項目中新建一個Cocoa Touch Class文件,取名為:MyCellWithXib,繼承自UITableViewCell,勾選”Also create XIB file”。
進入創建好的MyCellWithXib.h文件,聲明要顯示到cell上的控件:

點擊MyCellWithXib.xib文件,進入xib界面,將要要添加的控件拖到xib界面上。
然後將界面上的控件和MyCellWithXib.swift文件中聲明的控件連線

如果需要代碼控制某個控件的屬性,就在MyCellWithXib.swift中重寫cell的init方法,在init方法中控制某個控件的屬性:
// 重寫init方法
- (instancetype)initWithStyle:(UITableViewCellStyle)style reuseIdentifier:(NSString *)reuseIdentifier {
    if (self = [super initWithStyle:style reuseIdentifier:reuseIdentifier]) {
        // 在此控制控件的屬性
        // ......
    }
    return self;
}
MyCellWithXib的工作完畢,現在進入創建UITableview的代碼處,增加一個Xib的聲明:
// 創建一個cell重用的ID
NSString *cellID = @"cellID";
// 對tableView注冊xib
[tableView registerNib:[UINib nibWithNibName:@"MyCellWithXib" bundle:nil] forCellReuseIdentifier:cellID];
然後找到tableView實現數據源的方法:
// 設置 Cell
-(UITableViewCell *)tableView:(UITableView *)tableView cellForRowAtIndexPath:(NSIndexPath *)indexPath {
    // 創建一個cell重用的ID(這裡的cellID必須和上面對tableView注冊xib時的cellID一致)
    NSString *cellID = @"cellID";
    // 創建一個MyCellWithXib的cell
    MyCellWithXib *cell = [tableView dequeueReusableCellWithIdentifier: cellID forIndexPath:indexPath];
    return cell;
}
最後一步:設置cell的高度
// 設置 cell 的高度
-(CGFloat)tableView:(UITableView *)tableView heightForRowAtIndexPath:(NSIndexPath *)indexPath {
    return 140;
}
完畢,運行一下,就會看到自定義的cell。
以上,是自定義UITableviewCell的兩種方式。下一篇會介紹UITableview的下拉刷新、上拉加載、數據刷新等內容。