創建第一款iPhone應用程序
編輯:IOS入門簡介
創建第一款iPhone應用程序
現在讓我們來創建一個在iOS模擬器上運行的簡單視圖應用(空白的應用程序)。
操作步驟如下:
1、打開Xcode並選擇創建一個新的Xcode項目。
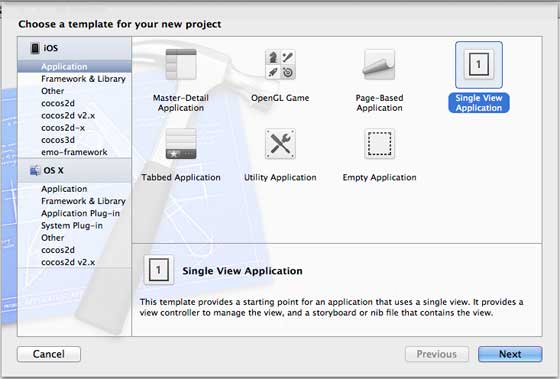
2. 然後選擇單一視圖應用程序
3. 接下來輸入產品名稱即應用程序名稱、組織名稱和公司標識符。
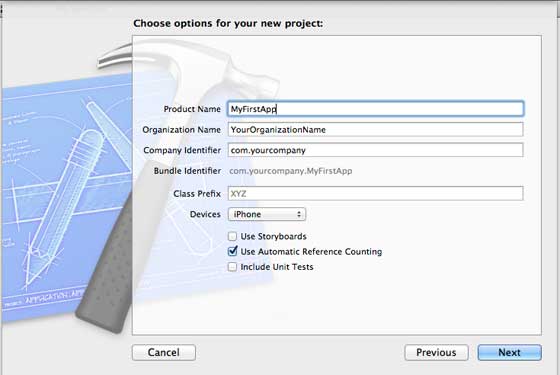
4. 確定已經選擇自動應用計數,以自動釋放超出范圍的資源。單擊下一步。
5.選擇項目目錄並選擇創建

6. 你將看到如下所示的頁面
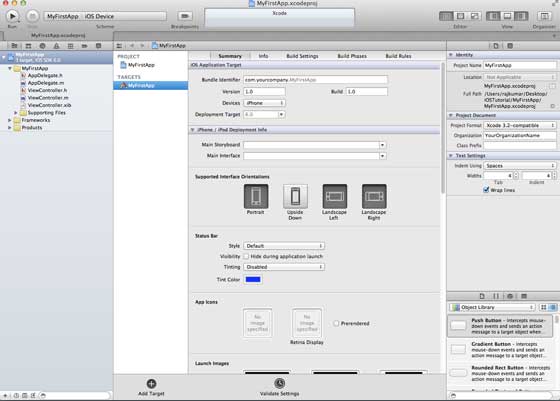
屏幕上方能夠設置方向、生成和釋放。有一個部署目標,設備支持4.3及以上版本的部署目標,這些不是必須的,現在只要專注於運行該應用程序。
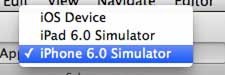
7. 在下拉菜單中選擇iPhone Simulator並運行。
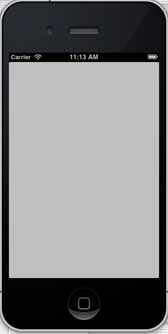
8. 成功運行第一個應用程序,將得到的輸出,如下所示。
更改背景顏色使之有開始的界面生成器。選擇ViewController.xib。在右側選擇背景選項,更改顏色並運行。
在上述項目中,默認情況下,部署目標已設置為iOS6.0且自動布局將被啟用。
為確保應用程序能iOS4.3設備上正常運行,我們已經在開始創建應用程序時修改了部署目標,但我們不禁用自動布局,要取消自動布局,我們需要取消選擇自動班上復選框在文件查看器的每個nib,也就是xib文件。
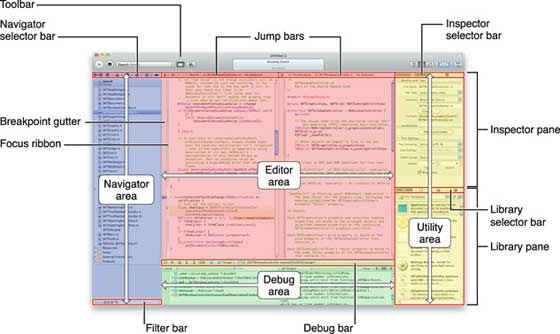
Xcode項目IDE的各部分顯示如下(蘋果Xcode4用戶文檔)
在上面所示的檢查器選擇器欄中可以找到文件檢查器,且可以取消選擇自動布局。當你想要的目標只有iOS6.0的設備時,可以使用自動布局。
當然,也可以使用新功能,如當加注到iOS6時,就可以使用passbook這一功能。現在,以Ios4.3作為部署目標。
深入了解第一款IOS應用程序代碼
5個不同文件生成應用程序,如下所示- AppDelegate.h
- AppDelegate.m
- ViewController.h
- ViewController.m
- ViewController.xib
我們使用單行注釋(//)來解釋簡單代碼,重要的項目代碼解釋在代碼下方。
AppDelegate.h
// Header File that provides all UI related items.
#import <UIKit/UIKit.h>
 // Forward declaration (Used when class will be defined /imported in future)
@class ViewController;

 // Interface for Appdelegate
@interface AppDelegate : UIResponder <UIApplicationDelegate>
// Property window
@property (strong, nonatomic) UIWindow *window;
 // Property Viewcontroller
@property (strong, nonatomic) ViewController *viewController;
//this marks end of interface
@end
代碼說明
- AppDelegate調用UIResponder來處理Ios事件。
- 完成UIApplication的命令,提供關鍵應用程序事件,如啟動完畢,終止,等等
- 在iOS設備的屏幕上用UIWindow對象來管理和協調各種視角,它就像其它加載視圖的基本視圖一樣。通常一個應用程序只有一個窗口。
- UIViewController來處理屏幕流
AppDelegate.m
// Imports the class Appdelegate's interface
import "AppDelegate.h"

// Imports the viewcontroller to be loaded
#import "ViewController.h"

// Class definition starts here
@implementation AppDelegate

// Following method intimates us the application launched  successfully
- (BOOL)application:(UIApplication *)application
 didFinishLaunchingWithOptions:(NSDictionary *)launchOptions
{
    self.window = [[UIWindow alloc] initWithFrame:
	[[UIScreen mainScreen] bounds]];
    // Override point for customization after application launch.
    self.viewController = [[ViewController alloc]
	 initWithNibName:@"ViewController" bundle:nil];
    self.window.rootViewController = self.viewController;
    [self.window makeKeyAndVisible];
    return YES;
}

- (void)applicationWillResignActive:(UIApplication *)application
{
    /* Sent when the application is about to move from active to inactive state.
    This can occur for certain types of temporary interruptions
    (such as an incoming phone call or SMS message)
    or when the user quits the application and it begins the transition to the
    background state. Use this method to pause ongoing tasks, disable timers,
    and throttle down OpenGL ES frame rates. Games should use this method
    to pause the game.*/
}

- (void)applicationDidEnterBackground:(UIApplication *)application
{
    /* Use this method to release shared resources, save user data, invalidate
    timers, and store enough application state information	to restore your
    application to its current state in case it is terminated later. If your
    application supports background execution, this method is called instead
    of applicationWillTerminate: when the user quits.*/
}

- (void)applicationWillEnterForeground:(UIApplication *)application
{
    /* Called as part of the transition from the background to the inactive state;
    here you can undo many of the changes made on entering the background.*/
}

- (void)applicationDidBecomeActive:(UIApplication *)application
{
    /* Restart any tasks that were paused (or not yet started) while the
    application was inactive. If the application was previously in the background,
	optionally refresh the user interface.*/
}

- (void)applicationWillTerminate:(UIApplication *)application
{
    /* Called when the application is about to terminate. Save data if appropriate.
    See also applicationDidEnterBackground:. */
}

@end
代碼說明
- 此處定義UIApplication。上面定義的所有方法都是應用程序UI調動和不包含任何用戶定義的方法。
- UIWindow對象被分配用來保存應用程序分配對象。
- UIController作為窗口初始視圖控制器
- 調用makeKeyAndVisible能使窗口可見
ViewController.h
#import

// Interface for class ViewController
@interface ViewController : UIViewController

@end
代碼說明
- ViewController類繼承UIViewController,為iOS應用程序提供基本視圖管理模型。
ViewController.m
#import "ViewController.h"

// Category, an extension of ViewController class
@interface ViewController ()

@end

@implementation ViewController

- (void)viewDidLoad
{
    [super viewDidLoad];
	// Do any additional setup after loading the view, typically from a nib.
}

- (void)didReceiveMemoryWarning
{
    [super didReceiveMemoryWarning];
    // Dispose of any resources that can be recreated.
}

@end
代碼說明
- 在這裡兩種方法實現UIViewController類的基類中定義
- 初始視圖加載後調用viewDidLoad中的安裝程序
- 在內存警告的情況下調用didReceviveMemoryWarning

相關文章
+- 解析iOS開辟中的FirstResponder第一呼應對象
- 第一個小順序雲筆記經過微信審核分享
- iOS 開發 處理UITableViewcell單選靜態改動cell文字和背景顏色的功用,且第一次默許選擇第一個cell
- ios開發之C言語第一天
- 2017年第一篇博客
- React Native跨平台挪動使用學習與開發(二) 第一個項目
- ios 面試題 第一彈
- ViewController創建後釋放閃退
- iOS創建對象的不同姿勢詳解
- 第一個React native app
- iOS單例的創建與銷毀示例
- IOS 通過tag刪除動態創建的UIButton
- 在Excel2013中怎麼創建數據透視表
- 怎麼才能在第一時間購買到蘋果iPhone6?[多圖]
- 蘋果iOS9五大改變,你會第一時間升級嗎